Episode V
THE EMPIRE STRIKES BACK
- It is a dark time for the
- Rebellion. Although the Death
- Star has been destroyed,
- Imperial troops have driven the
- Rebel forces from their hidden
- base and pursued them across
- the galaxy.
- Evading the dreaded Imperial
- Starfleet, a group of freedom
- fighters led by Luke Skywalker
- has established a new secret
- base on the remote ice world
- of Hoth.
- The evil lord Darth Vader,
- obsessed with finding young
- Skywalker, has dispatched
- thousands of remote probes into
- the far reaches of space....
Echo Base, Main Hangar
Where's Luke?
[Speak to Han about Luke's whereabouts.]
Head north following the markers to Han in the Echo Base Command Centre.
Chapter 1
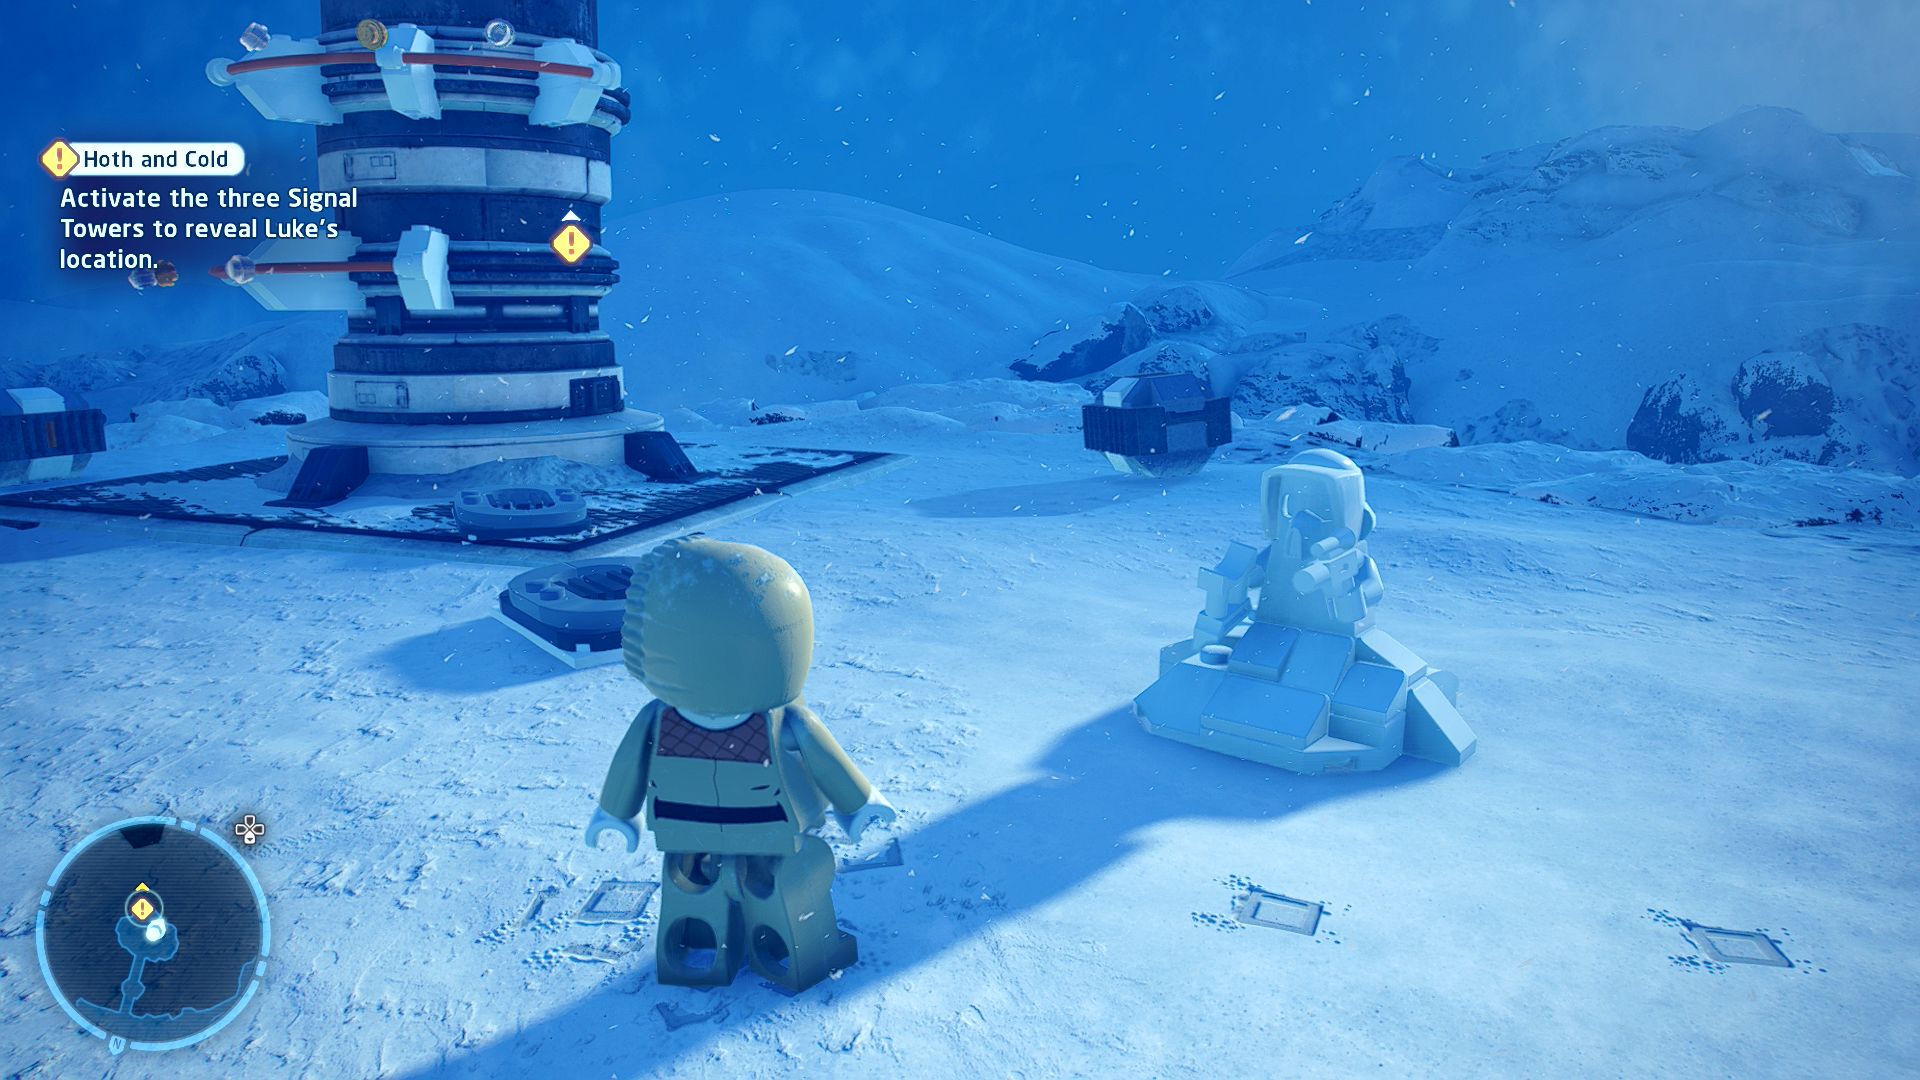
Hoth and Cold
| Silver | Blue | Purple |
|---|---|---|
| 33,333 | 66,666 | 100,000 |
[Activate the three Signal Towers to reveal Luke's location.]
We'll the do the one that you can see straight ahead of you when you start first but you can do them in any order you like. To get there though you'll need to go northeast to where you can see a zipline from the tower ends. A little further past that is an area with a probe droid patrolling around some cover, crates, and a snowspeeder turret. Avoid the red circle in front of the probe droid and shoot it down.
Pull the lever next to the snowspeeder turret then get in the snowspeeder and spin it around to face west so you can shoot some ice that's holding up a bridge. Walk to the end of the dropped half of the bridge and have Han aim at the support under the other side of the bridge on the left. The Scoundrel Opportunity will bring the other half down to where you can jump over onto it. Or using General Rieekan you can grapple up and pull the bridge down with his weight.
Before you start climbing the tower shoot down the probe droid that's patrolling the base of it. Han can't quite reach the first bar so to jump up there you'll need to smash the nearby crates and drag a larger crate with handles on over towards the tower (or you could switch to General Rieekan and grapple up to it). Now you can start the climb. Once you've shimmied and jumped your way to the top pull the lever to activate this first Signal Tower. You now need to aim the signal into the sky so that the beam turns green, it should just be up a little to the left. Leave using the zipline.
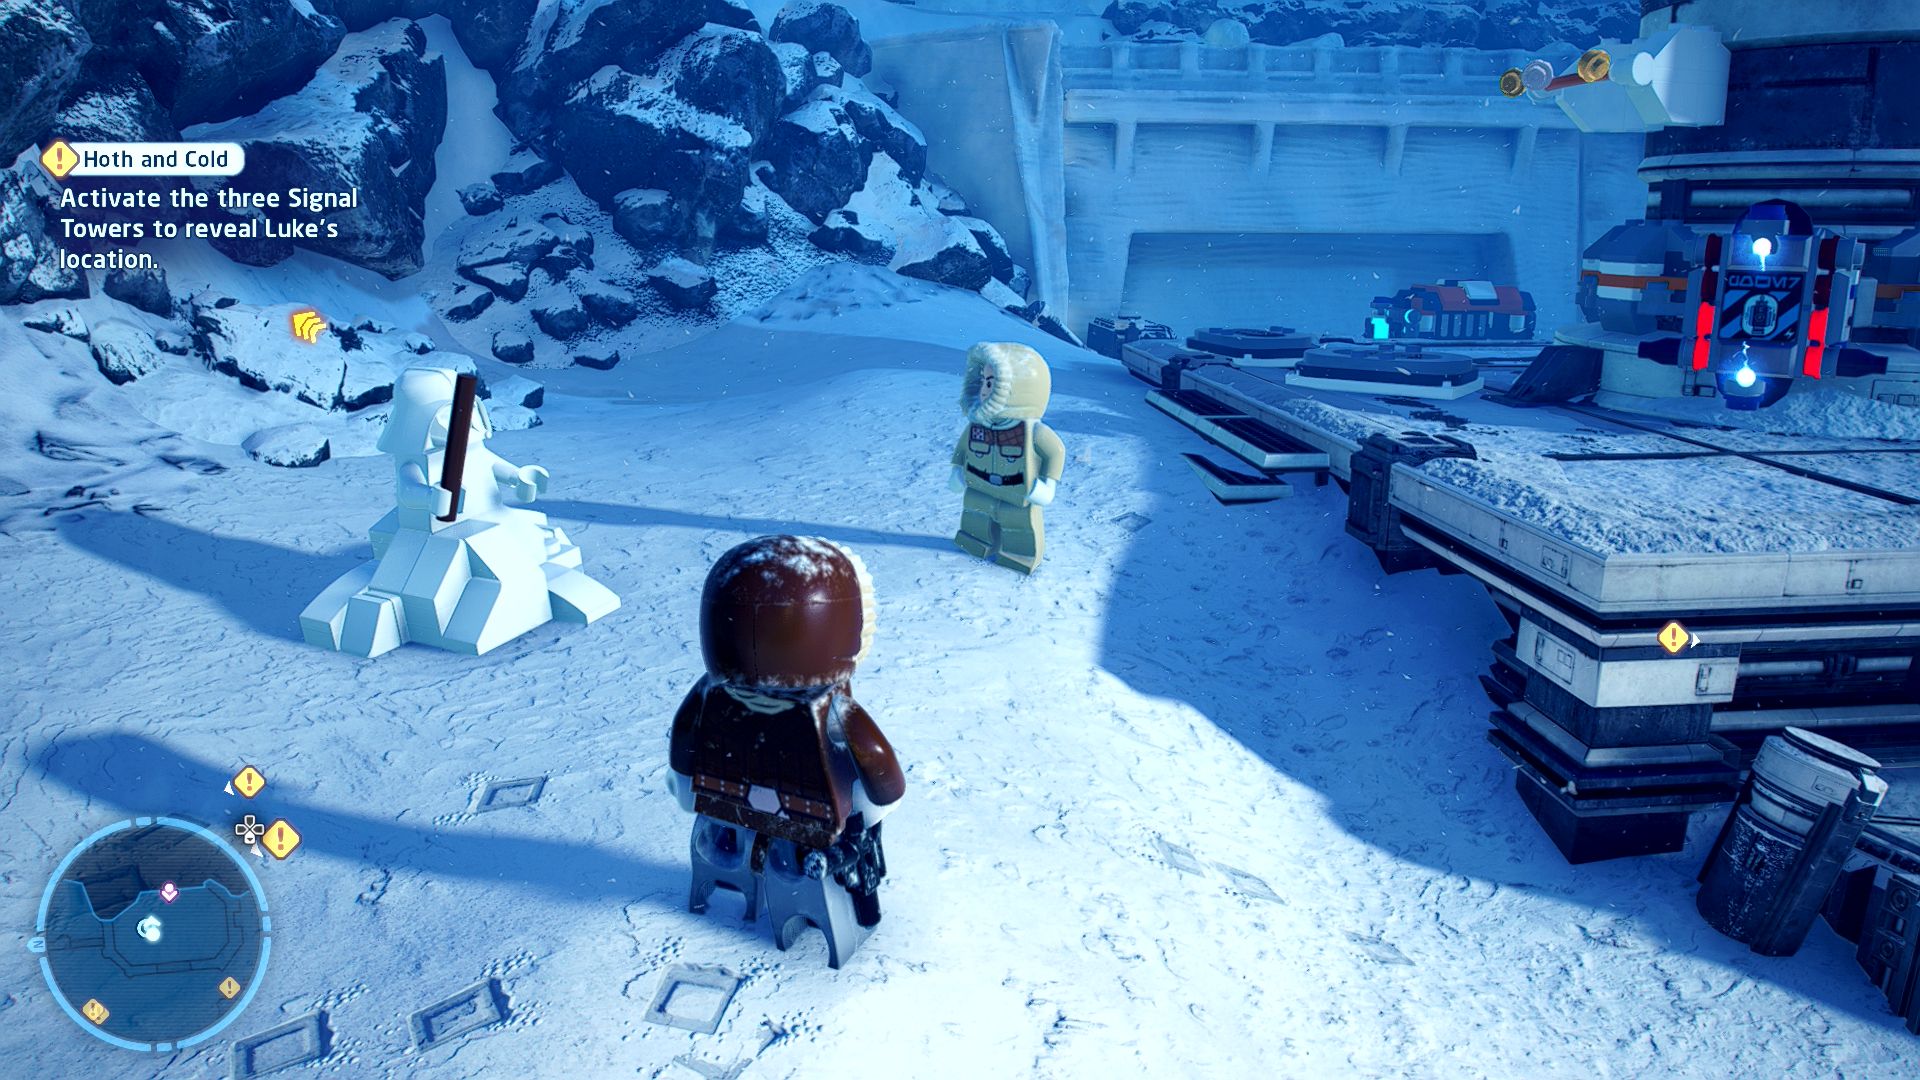
The second tower is over to the east side of the map. Approach the north end of the walls, making sure to shoot down the probe droid, and pull a switch next to the gate to open it partially. There's another probe droid inside for you to shoot down. Go left and up the steps to the top of the wall where there's a block you will want to push off the edge. Jump down after it and build the LEGO into a ladder back up. Before you go back up though pull the switch next to the gate again to shut it.
At the top of the wall walk over the closed gate and as you approach the tower another probe droid will appear and take a power cell that you'll need. Jump down and over to where it smashed up a bunch of stuff on the far side of the tower, from that debris you can build either a magnet or a turret. Your choice. Grab the power cell and plug it back into the tower.
Now that the tower is rotating again you'll be able to make it all the way to the top to flip the switch. Aim it up to the right, in the general direction that the first tower beam is pointing. Zip on down.
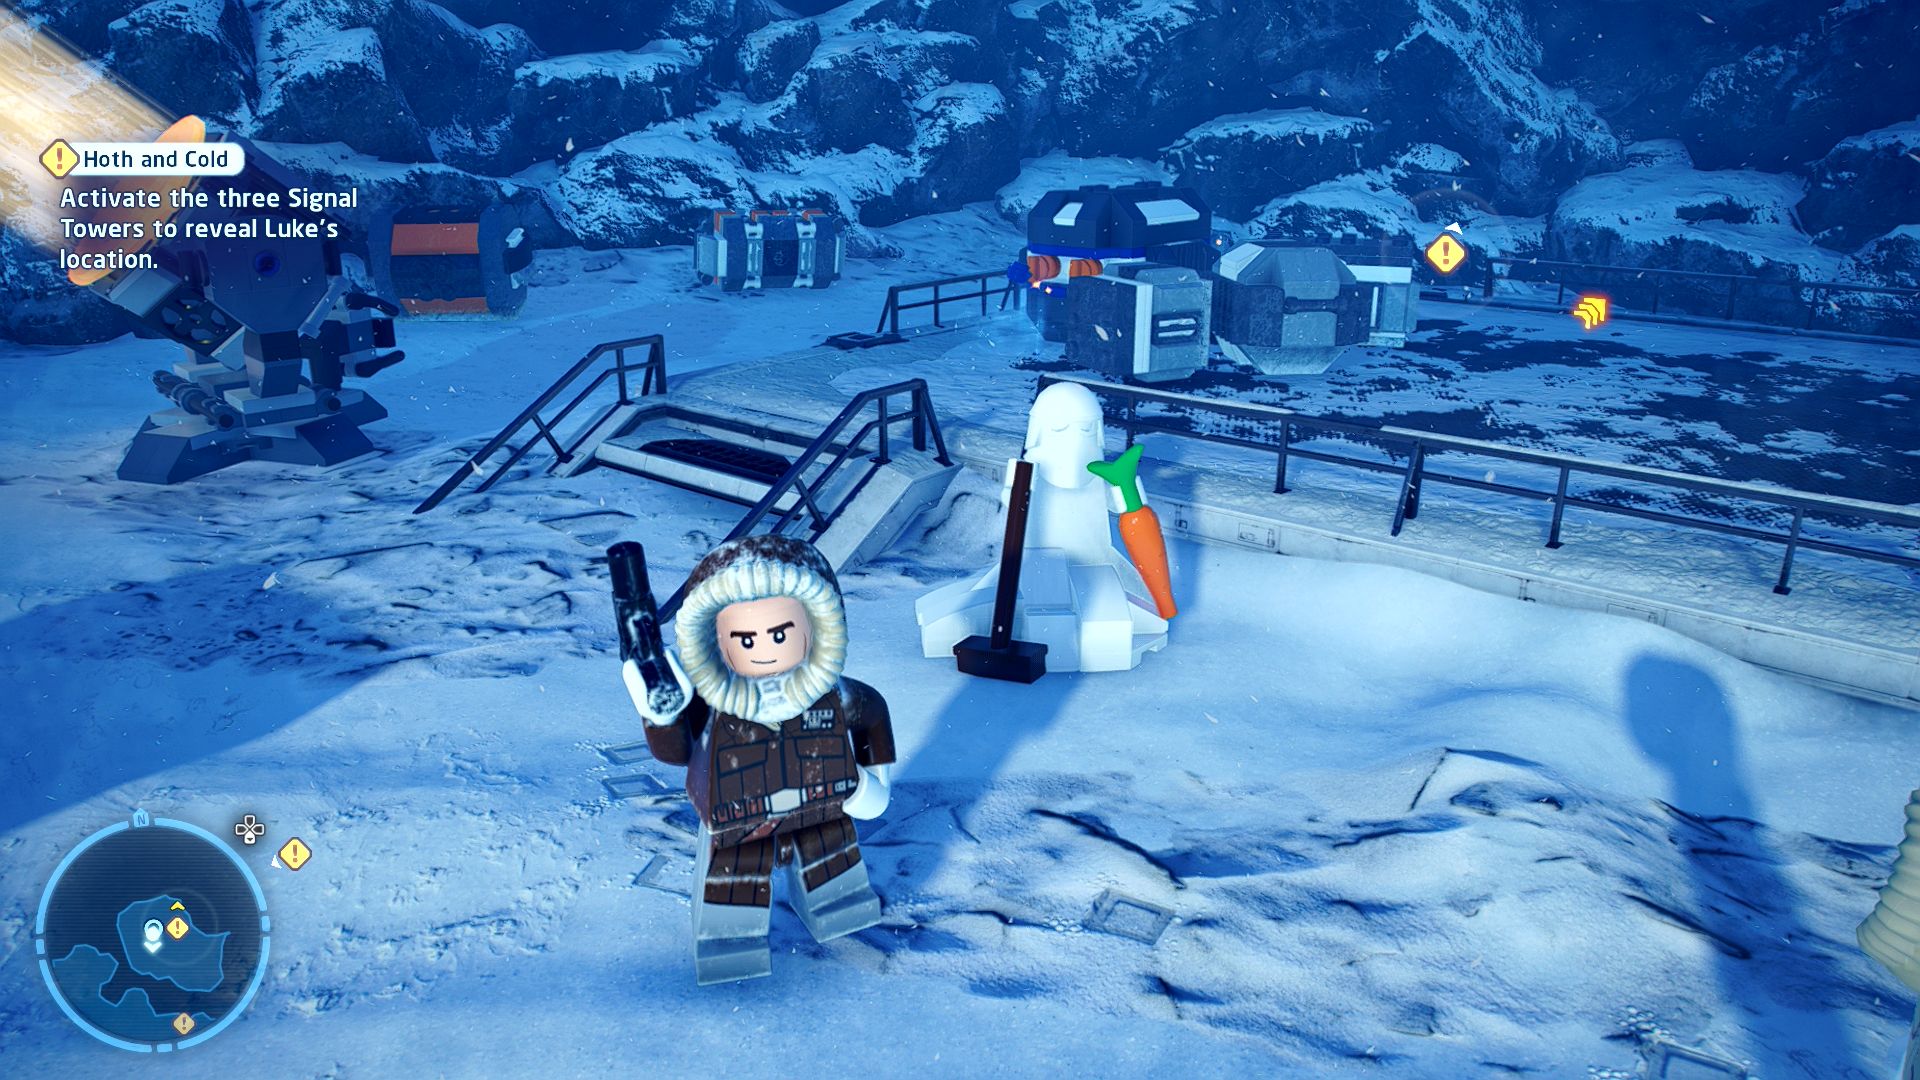
The third tower is in the south of the level. Cross a narrow bridge and attack another probe droid floating about over there. Han will complain about an ice covered bridge so off we go to the southwest where there's a narrow bridge leading to a rocky mound, go around the back of it and wind your way to the top where there's a turret you can climb inside. Use it to shoot the ice on the narrow bridge leading to the tower.
Climb up the final tower, ignore the collapsing nature of it, and pull the lever to activate the satellite dish. Point it towards where the other two are aiming (a bit up to the left) and then use the zipline to get down.
[Follow the signal to find Luke.]
Luke is pretty much in the dead centre of the map of course. On the southern side of the rocky outcrop there is a cave entrance blocked by ice, when you approach a Wampa will smash through grabbing a probe droid. Follow it inside to complete the level.
Level Challenges
- Avoid the Droid!
- Shoot 5 probe droids out of the air without them spotting you first.
- There are only 6 probe droids in the level that can count towards this so you don't have much wiggle room. By spotting you first for this challenge it just means that you need to start shooting it without having stepped into its red circle first. It can react and start attacking you and still count so long as you shot first. In fact you don't even need to kill them, one shot from a distance is all that it requires, you can then leave it to live out the rest of its life just floating around scanning the snow. Also don't be too concerned that if you don't get the other challenge on the first kill, the requirements for that are a little different even though it's worded exactly the same.
- Not a Probe-lem
- Shoot 1 probe droid out of the air without them spotting you first.
- These two challenges seem to have almost the same description but the requirement of what "spotting you" means seems to be slightly different as probes that count towards the 5 probe challenge don't always count towards this one. For this one you do need to actually kill it and it must be before it can react at all which is easy enough if you shoot from a distance.
- Stylish Way Down
- Find and use all 5 zipwires.
- There are the three main ones on top of each of the signal towers and then there are two more in the southern section. One next to the turret you use to clear the ice off the bridge and another shorter one near to where you land after that zipline.

Minikits
Minikit 1/5 - Snow Friends of Mine
Requires: None Story Mode: Yes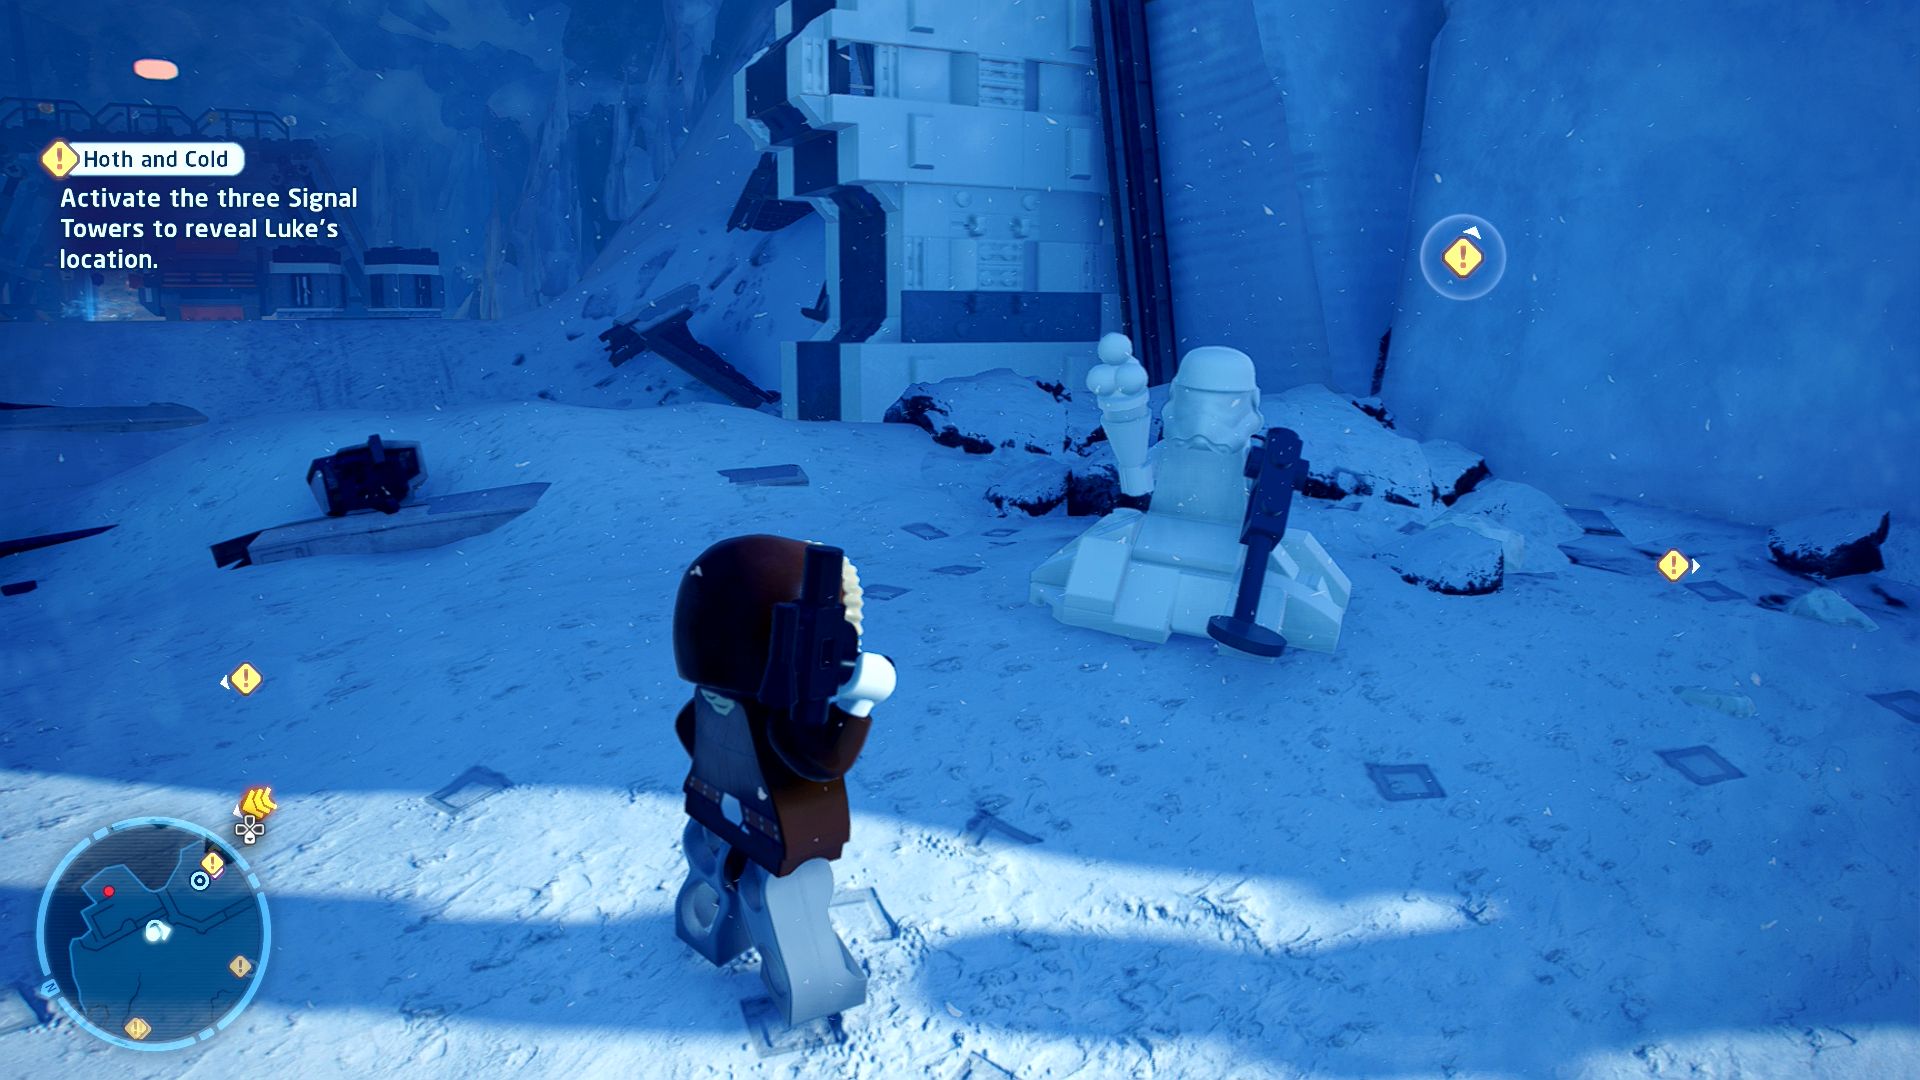
Did the probe droids build those snowmen...? They're LEARNING...
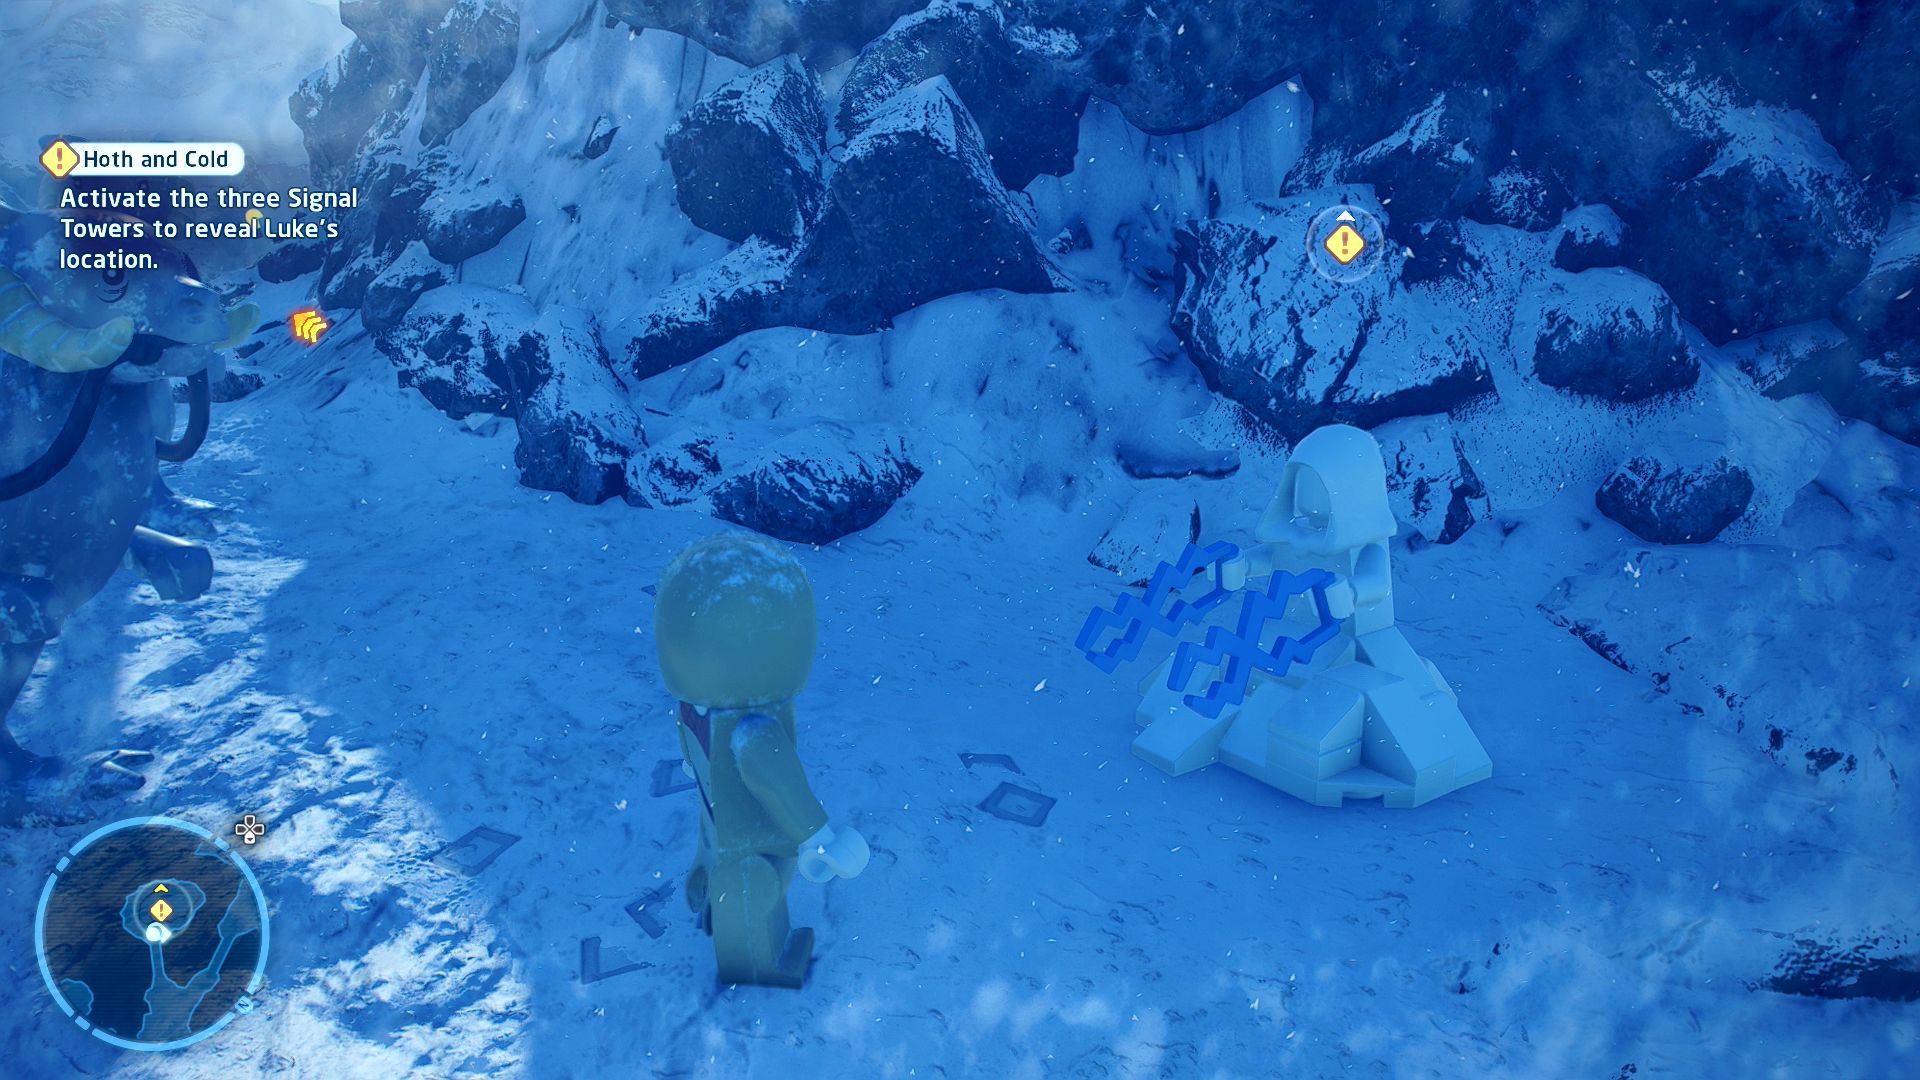
There are five of these scattered about the level.
- Outside the gate at the eastern tower
- Near the base of the eastern tower
- Near the base of the northern tower
- On southern island with turret
- Near the base of the southern tower
Minikit 2/5 - Meltdown
Requires: None Story Mode: Yes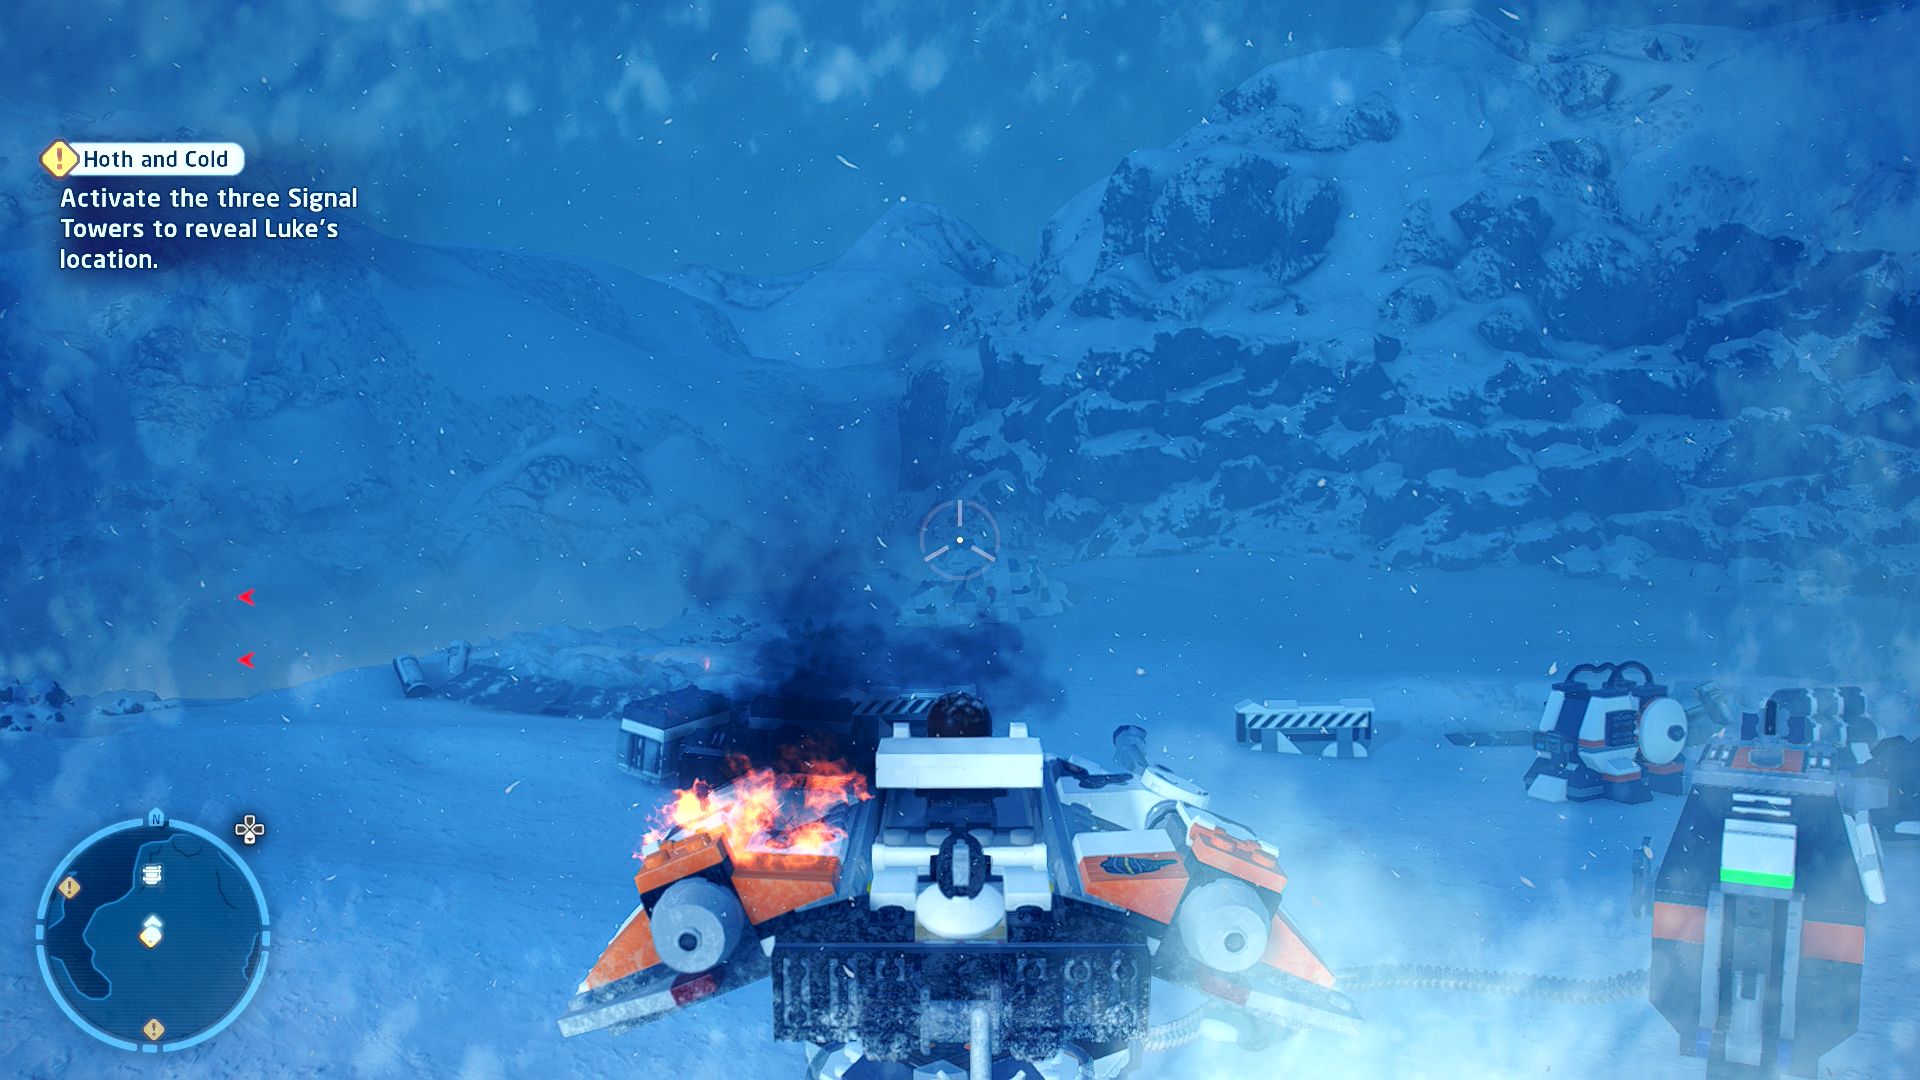
There must be a way to thaw out that frozen minikit by the snowspeeder...
By the snowspeeder turret in the north of the level is a frozen minikit. Use the snowspeeder's guns to "melt" it.
Minikit 3/5 - Chain Reaction
Requires: None Story Mode: Yes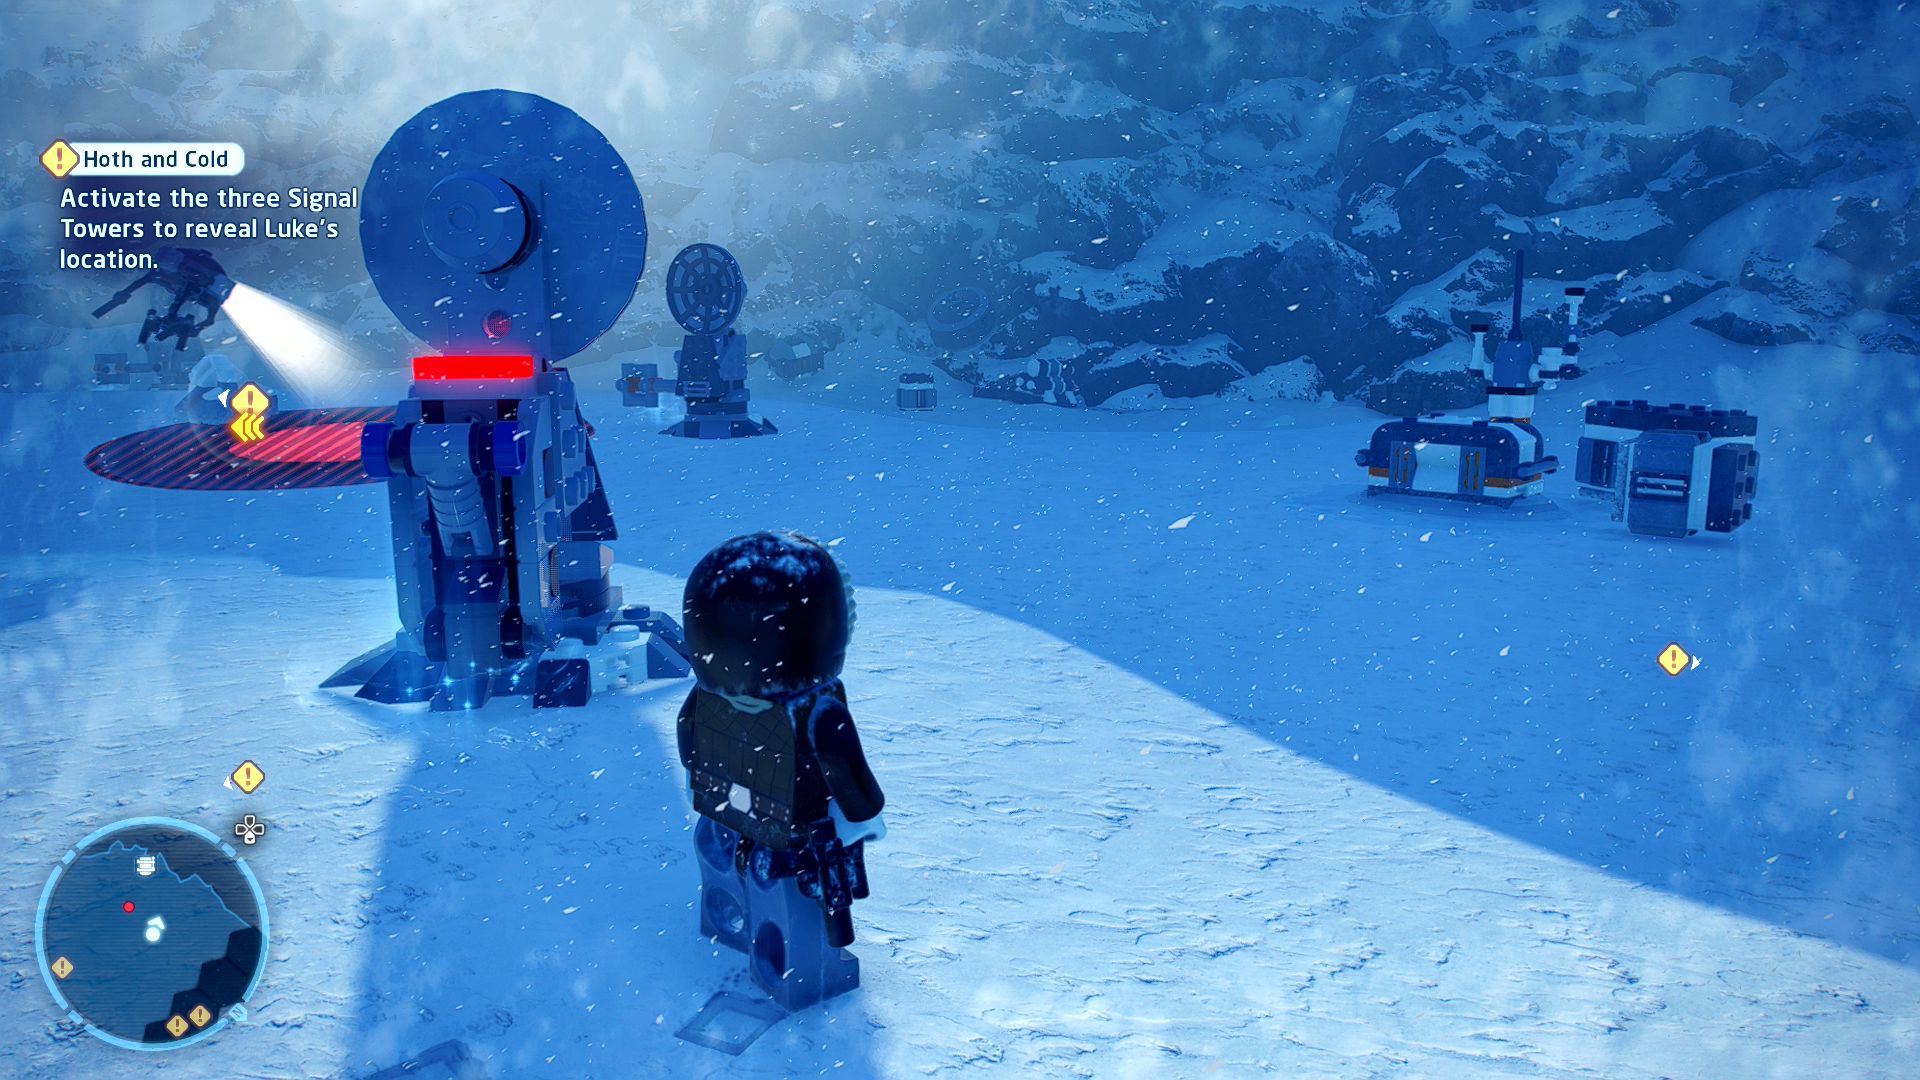
What happens if you shoot a P-Tower turret with another P-Tower? Let's find out...
The "P-Towers" in question are a set of four small satellite dishes in the southwestern corner of the map. Rotate two of them so that their beams hit another dish and then rotate the third so that its beam hits an object against the rocks. Flip the switch on the first satellite dish and if everything has been lined up correctly the container will explode and you'll get the parts to build a minikit canister.
Minikit 4/5 - Repurpose and Reuse
Requires: None Story Mode: Yes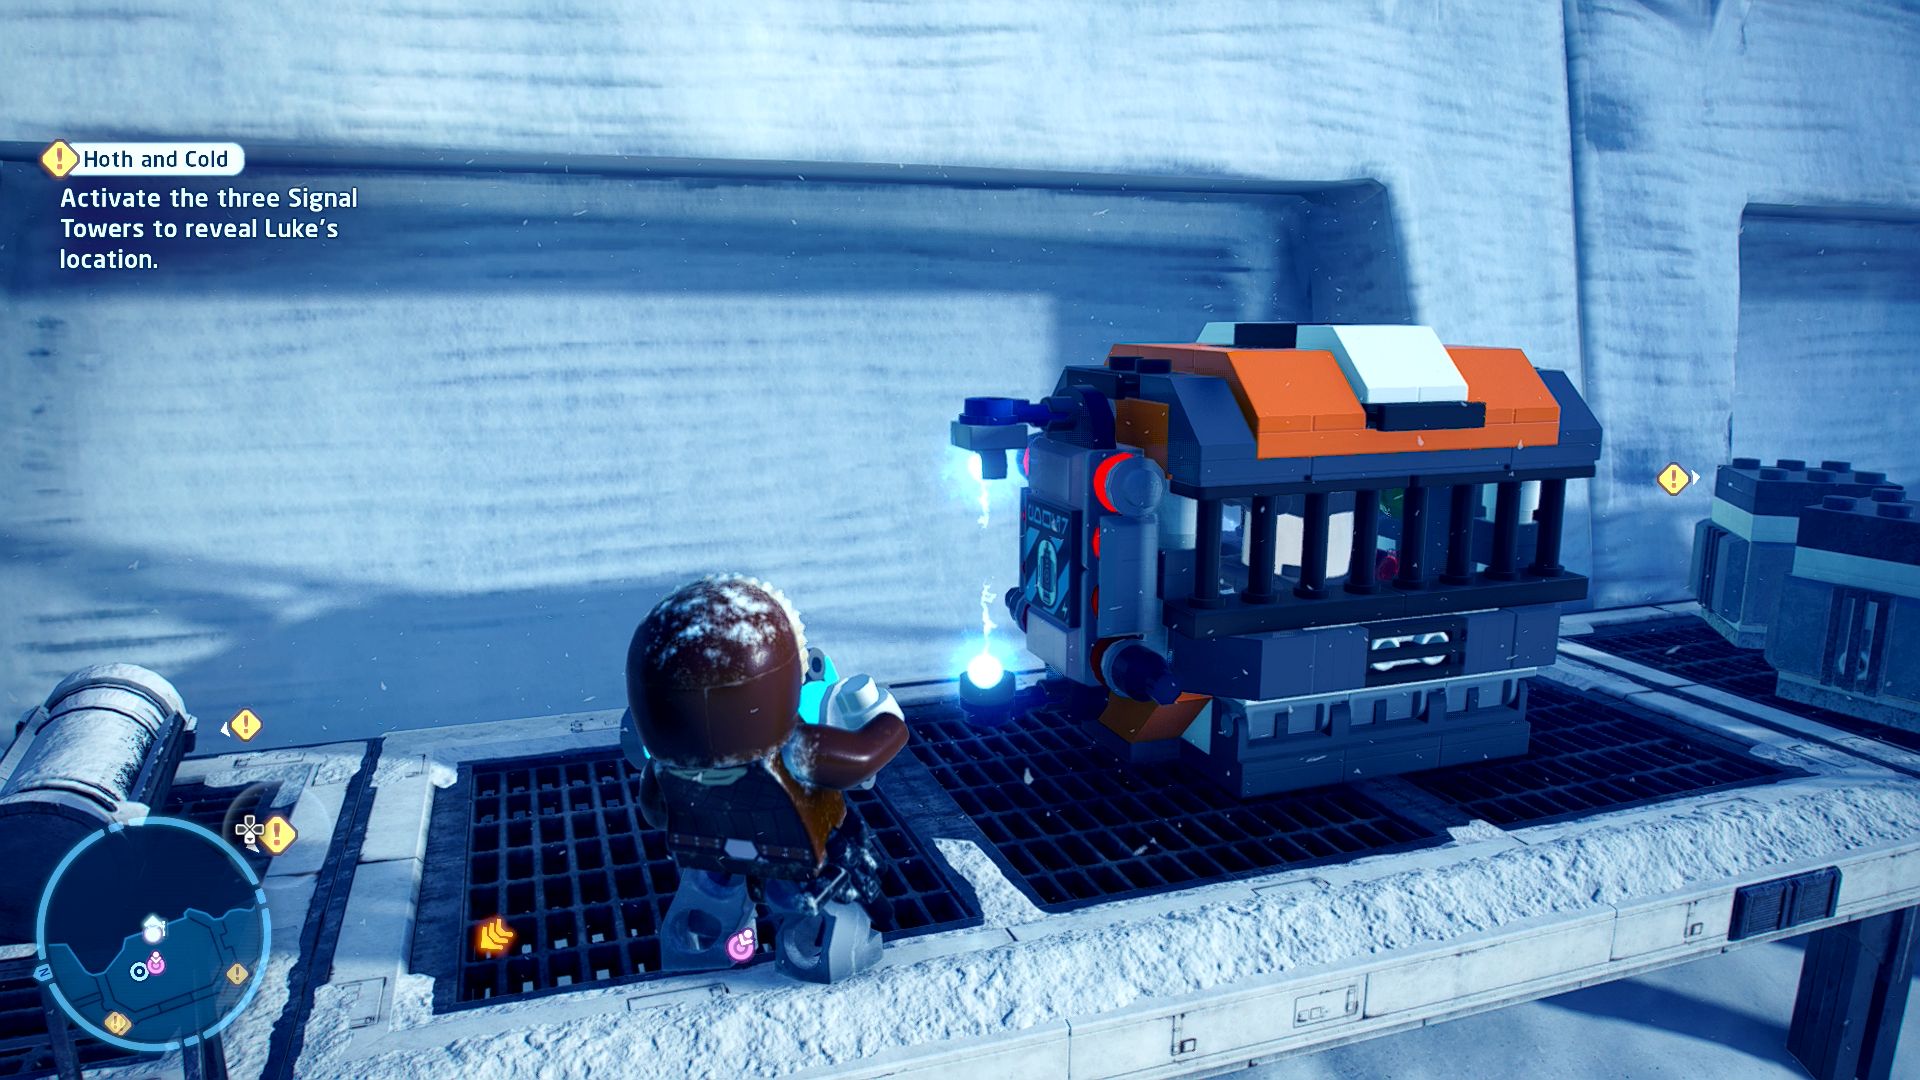
That's still a perfectly good power cell. Try using it somewhere else!
There is a cage near the signal tower that you have to power up with a power cell, take the power cell and plug it into the cage to open it up.
Minikit 5/5 - Up to Snow Good
Requires: None Story Mode: Yes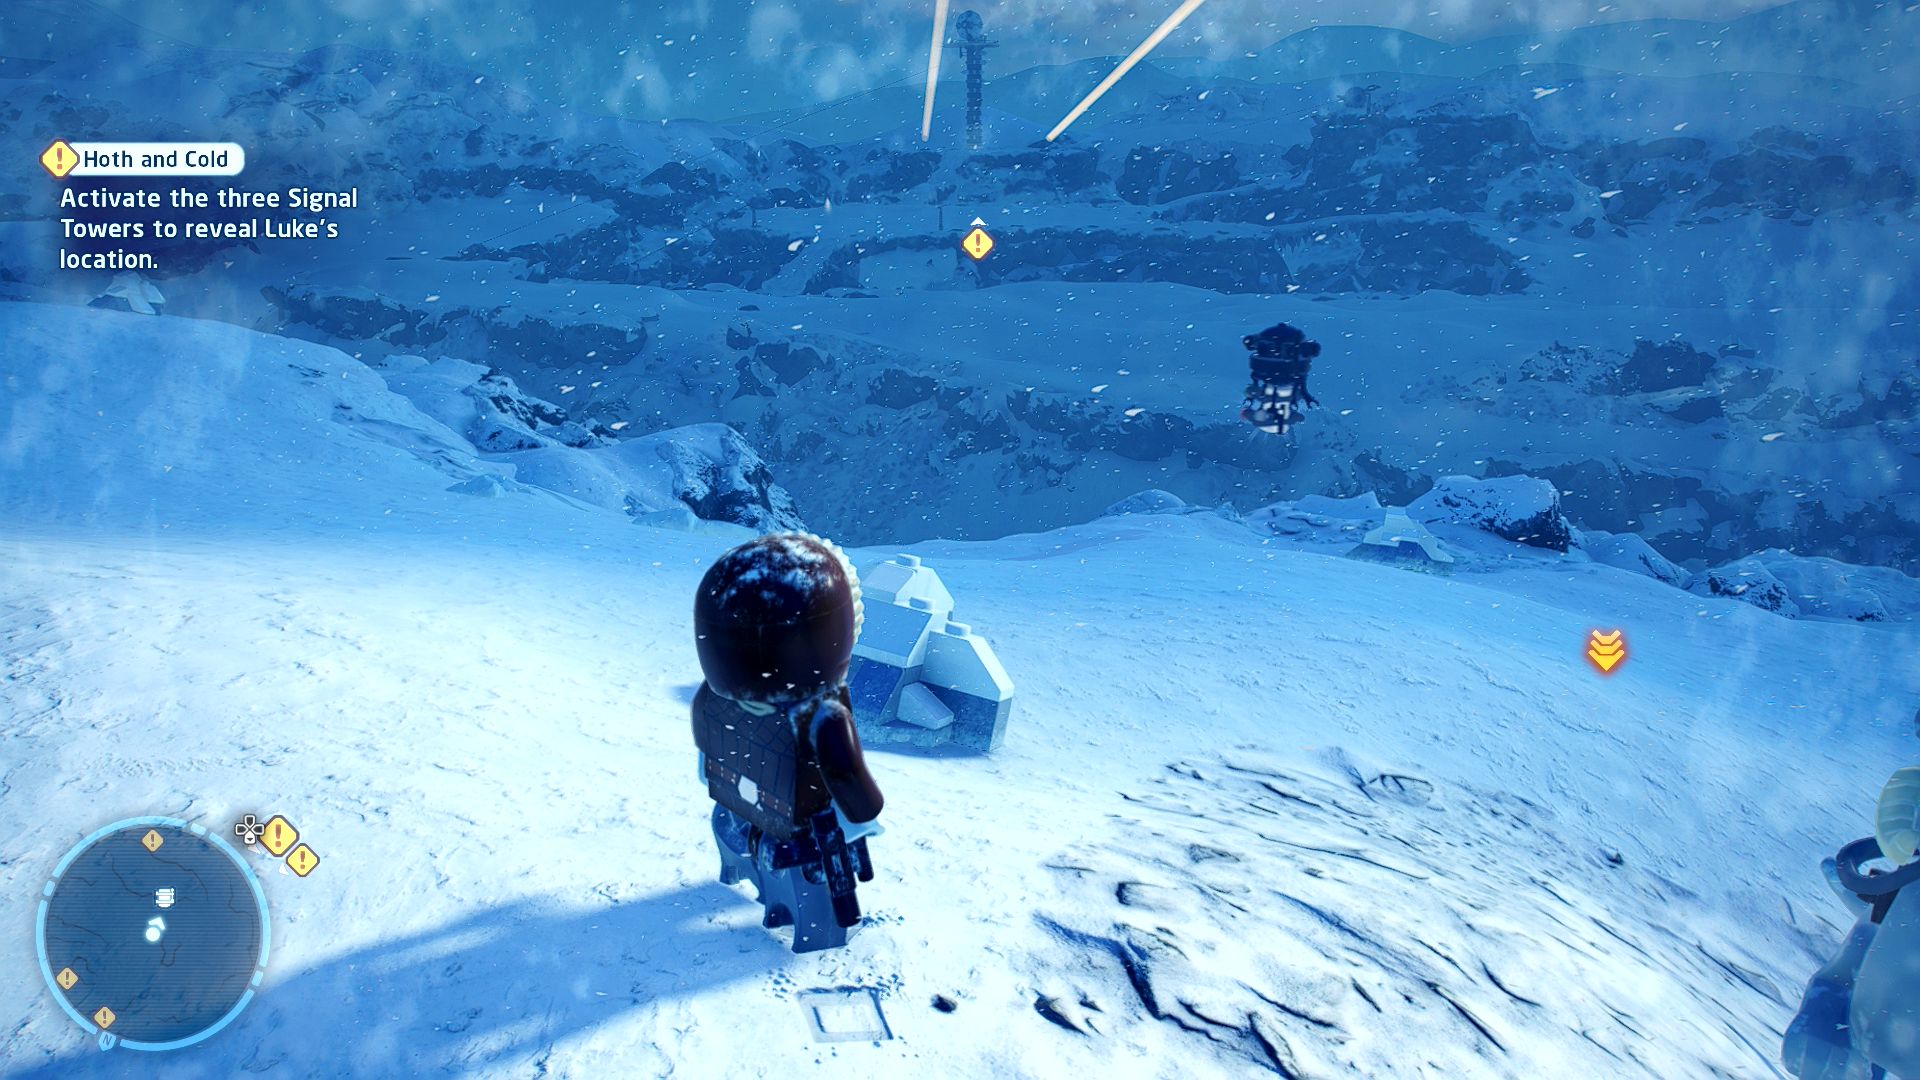
We've received reports of a probe droid holding something minikit-shaped near the wampa's cave!
On the rocky section in the middle of the level is a probe droid carrying a minikit.
GR-75 Medium Transport

| Cost | Character | |
|---|---|---|
|
|
- | General Rieekan |
|
|
- | General Rieekan (Hoth - Hood) |
|
|
- | Han Solo (Hoth - Hood) |
Episode V
THE EMPIRE STRIKES BACK
The story so far...
- The Rebels are now hiding on the
- ice planet HOTH. However, it
- appears some enjoy playing in the
- snow a little too much, with Luke
- taking a long time to return from
- the icy tundra. Concerned for his
- friend, Han mounted a tauntaun
- and went to find him.
- Eventually, Han found Luke
- trapped in a wampa's cave,
- hanging from the ceiling like wet
- Jedi laundry, and together they
- defeated the menacing beast.
- Was the wampa actually a threat,
- or just going about its wamping
- way? We may never know.
- Safe, but half-dazed, Luke saw a
- vision of Ben Kenobi in the snow,
- instructing him to go to Dagobah.
- And who was he to refuse a
- ghost? But first, Han and Luke
- must return to Echo Base....
Echo Base, Main Hangar
Prepare For Ground Assault!
[Prepare Luke's snowspeeder for battle.]
Just to the east of where you load in is Luke's snowspeeder, have R2-D2 use the Astromech Socket behind it to fix the engine and then get Luke to smash up the nearby crates to get the bricks to finish building the right wing. Now all you've got to do is use the Force to attach it to the rest of the snowspeeder.
[Head into battle!]
Step into the glowing circle next to the snowspeeder once you've finished fixing it.
Chapter 2
Assault on Echo Base
| Silver | Blue | Purple |
|---|---|---|
| 8,333 | 16,666 | 25,000 |
[Defeat the AT-STs!]
First up in this vehicle level are some AT-STs to destroy, there's a line of the straight ahead.
[Continue defending Echo Base!]
Another 6 AT-STs will be appear, time to defeat them too.
[Defeat the AT-ATs!]
And now the focal point of the Hoth battle: the AT-ATs. Fly towards the first one trying to get your grapple target to lock on. Once you activate it you need to loop around the AT-AT flying through the circles. If you mess up and disconnect just loop back around and try again.
And of course as soon as you defeat the first one another three will appear for you to defeat. Defeat them all in the same way but you may want to clear out their accompanying AT-STs before grappling. Wrapping around the third AT-AT will complete the level.
Level Challenges
- AT-ATrick
- Fly through the legs of an AT-AT.
- Do this during the section with three AT-ATs as they'll actually be walking, try to time it so that the legs are furthest apart.
- Show Off!
- Trip up the AT-ATs without the tow cable breaking.
- Don't get miss too many circles when circling them, if you break a cable you have to start the level over to get this challenge. Due to the way the level ends you won't have confirmation that you have this challenge completed until you see the end of level summary.
- Rogue Squadron, Form Up!
- Complete the level without being defeated.
- Most of my deaths in this level are from flying directly at the AT-STs so don't do that, you'll explode immediately. Same as the previous one, if you mess up you'll have to restart the level and you won't get confirmation you've completed it until the summary screens.
Minikit 1/5 - Snowed Under
Requires: None Story Mode: Yes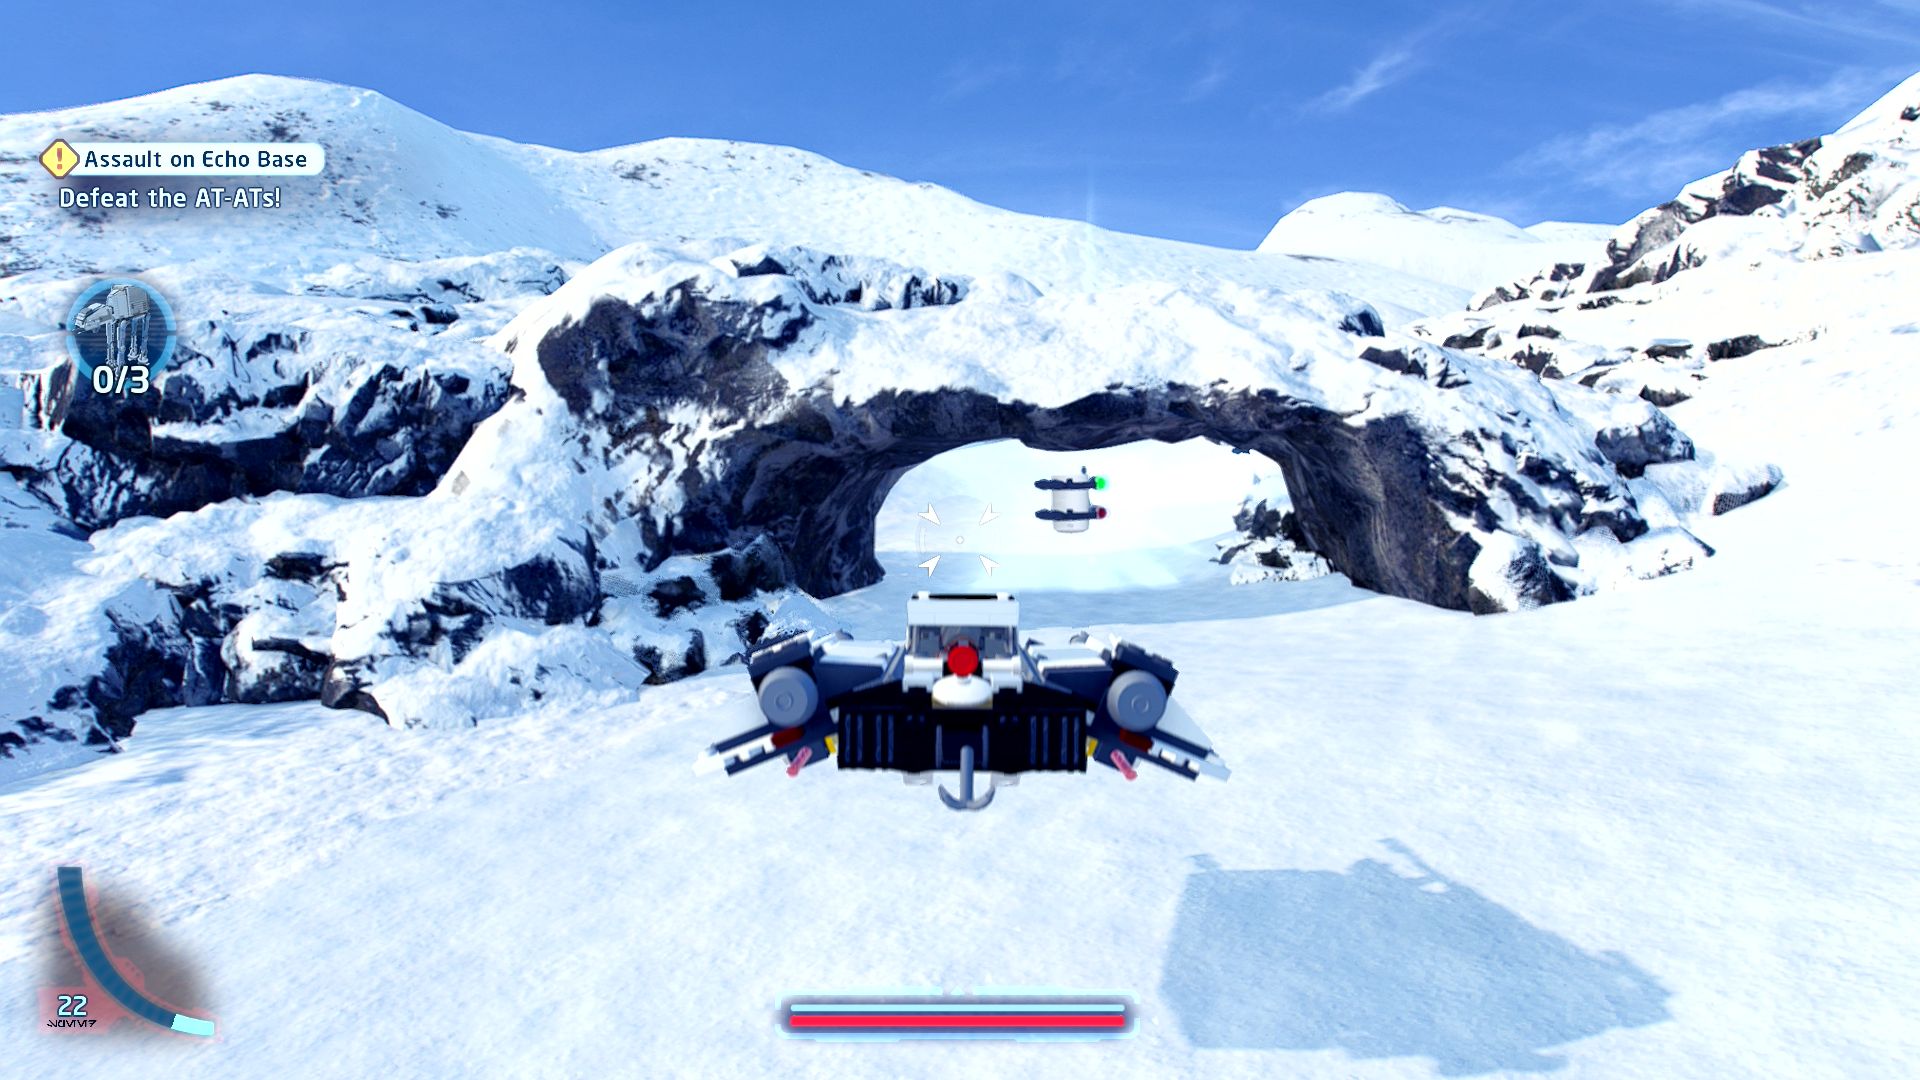
Luke wasn't the only thing left alone in the snow...
On the right side of the AT-AT area underneath an arch.
Minikit 2/5 - Did Somebody Order Ice?
Requires: None Story Mode: Yes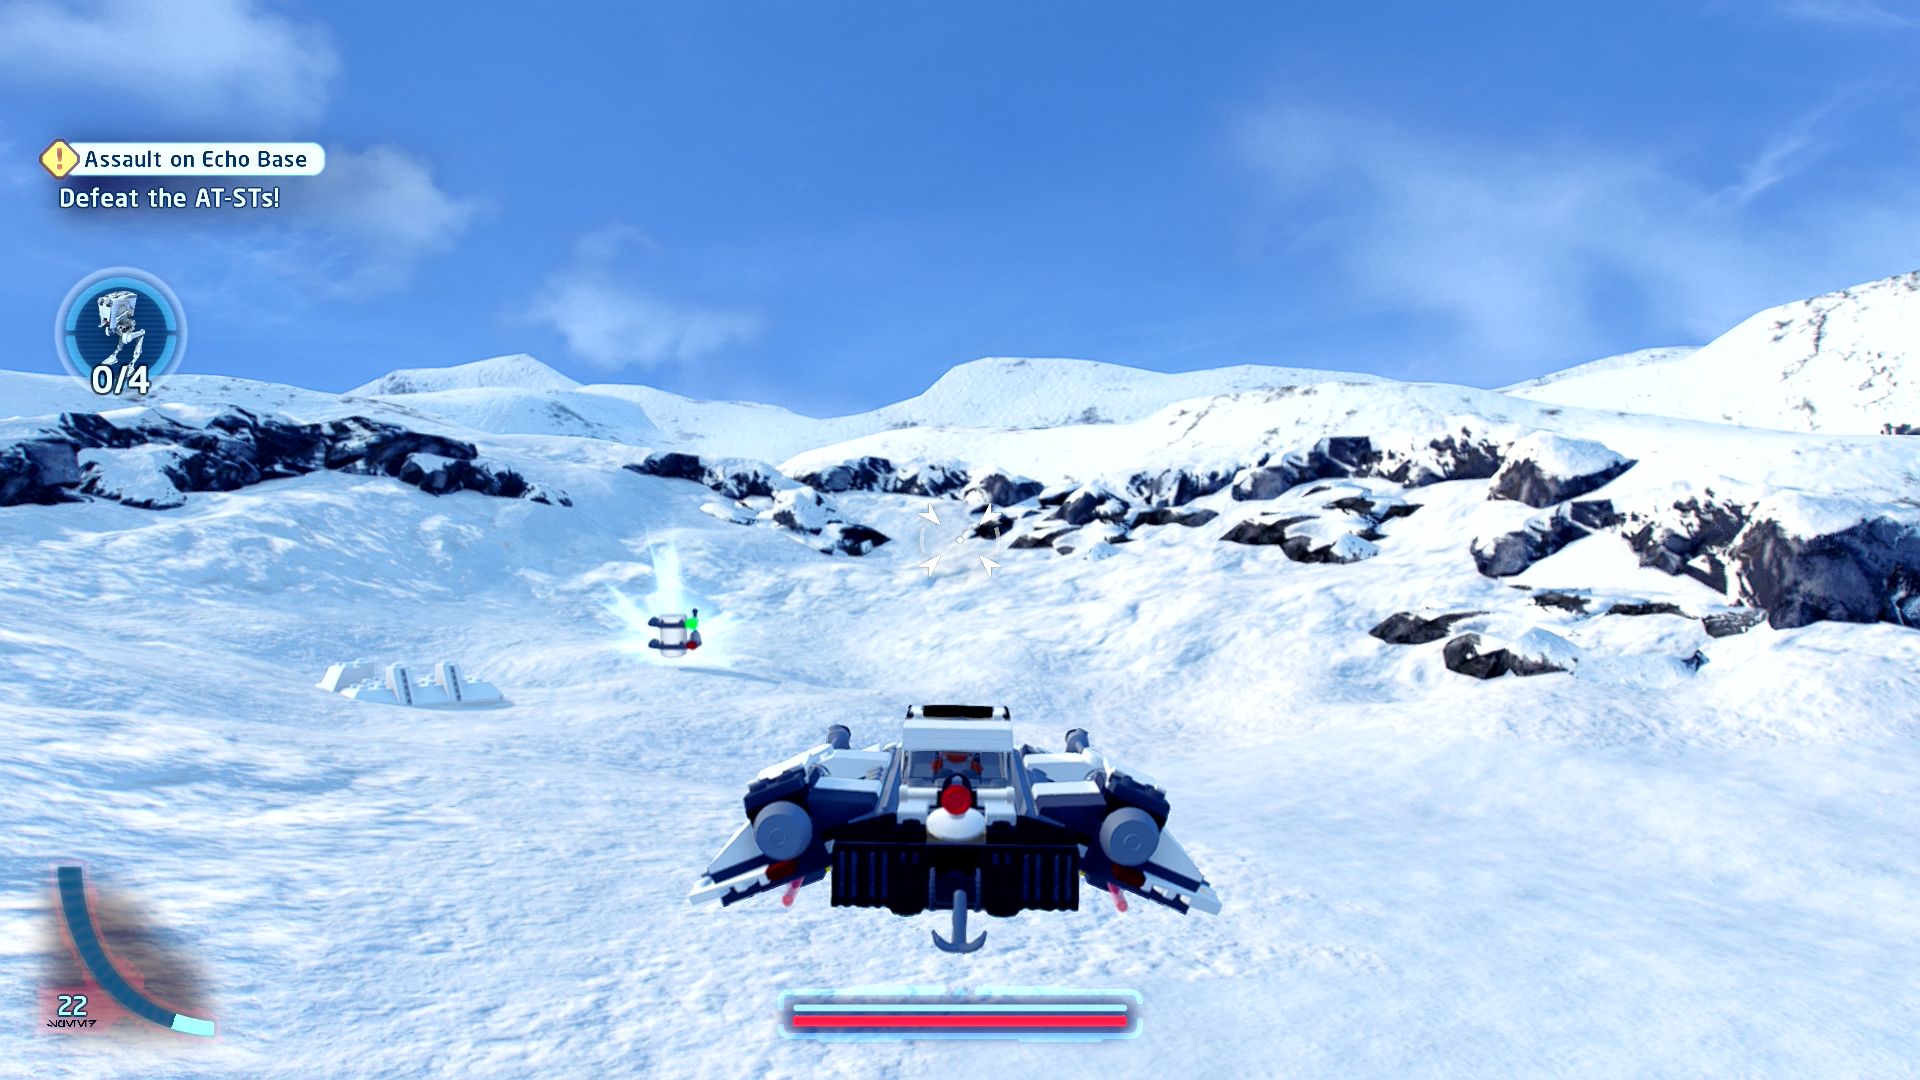
The prize is all yours; you just need to thaw it out!
At the start of the level head off to the right.
Minikit 3/5 - Let it Go
Requires: None Story Mode: Yes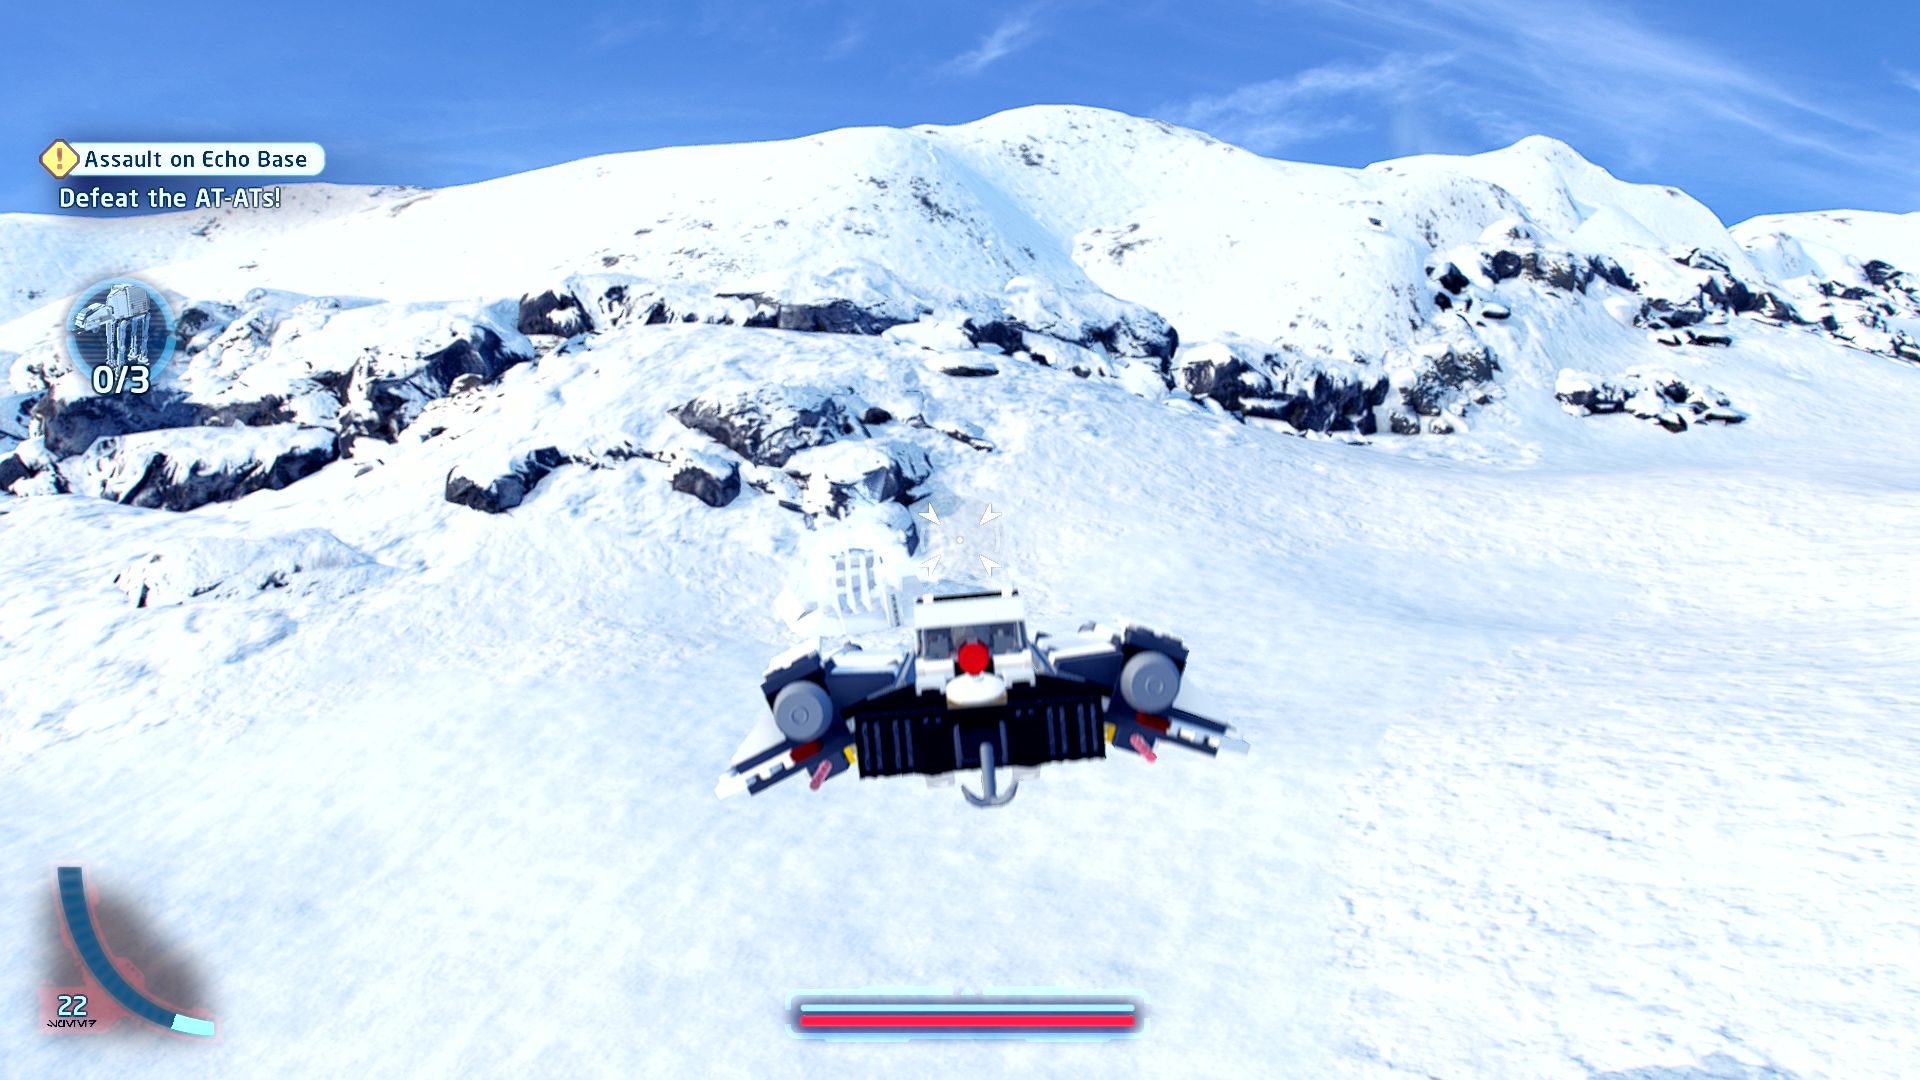
There is a lot of ice around here... Some of it must be hiding valuables!
At the start of the AT-AT area on the floor is some ice for you to shoot at.
Minikit 4/5 - Snow Problem
Requires: None Story Mode: Yes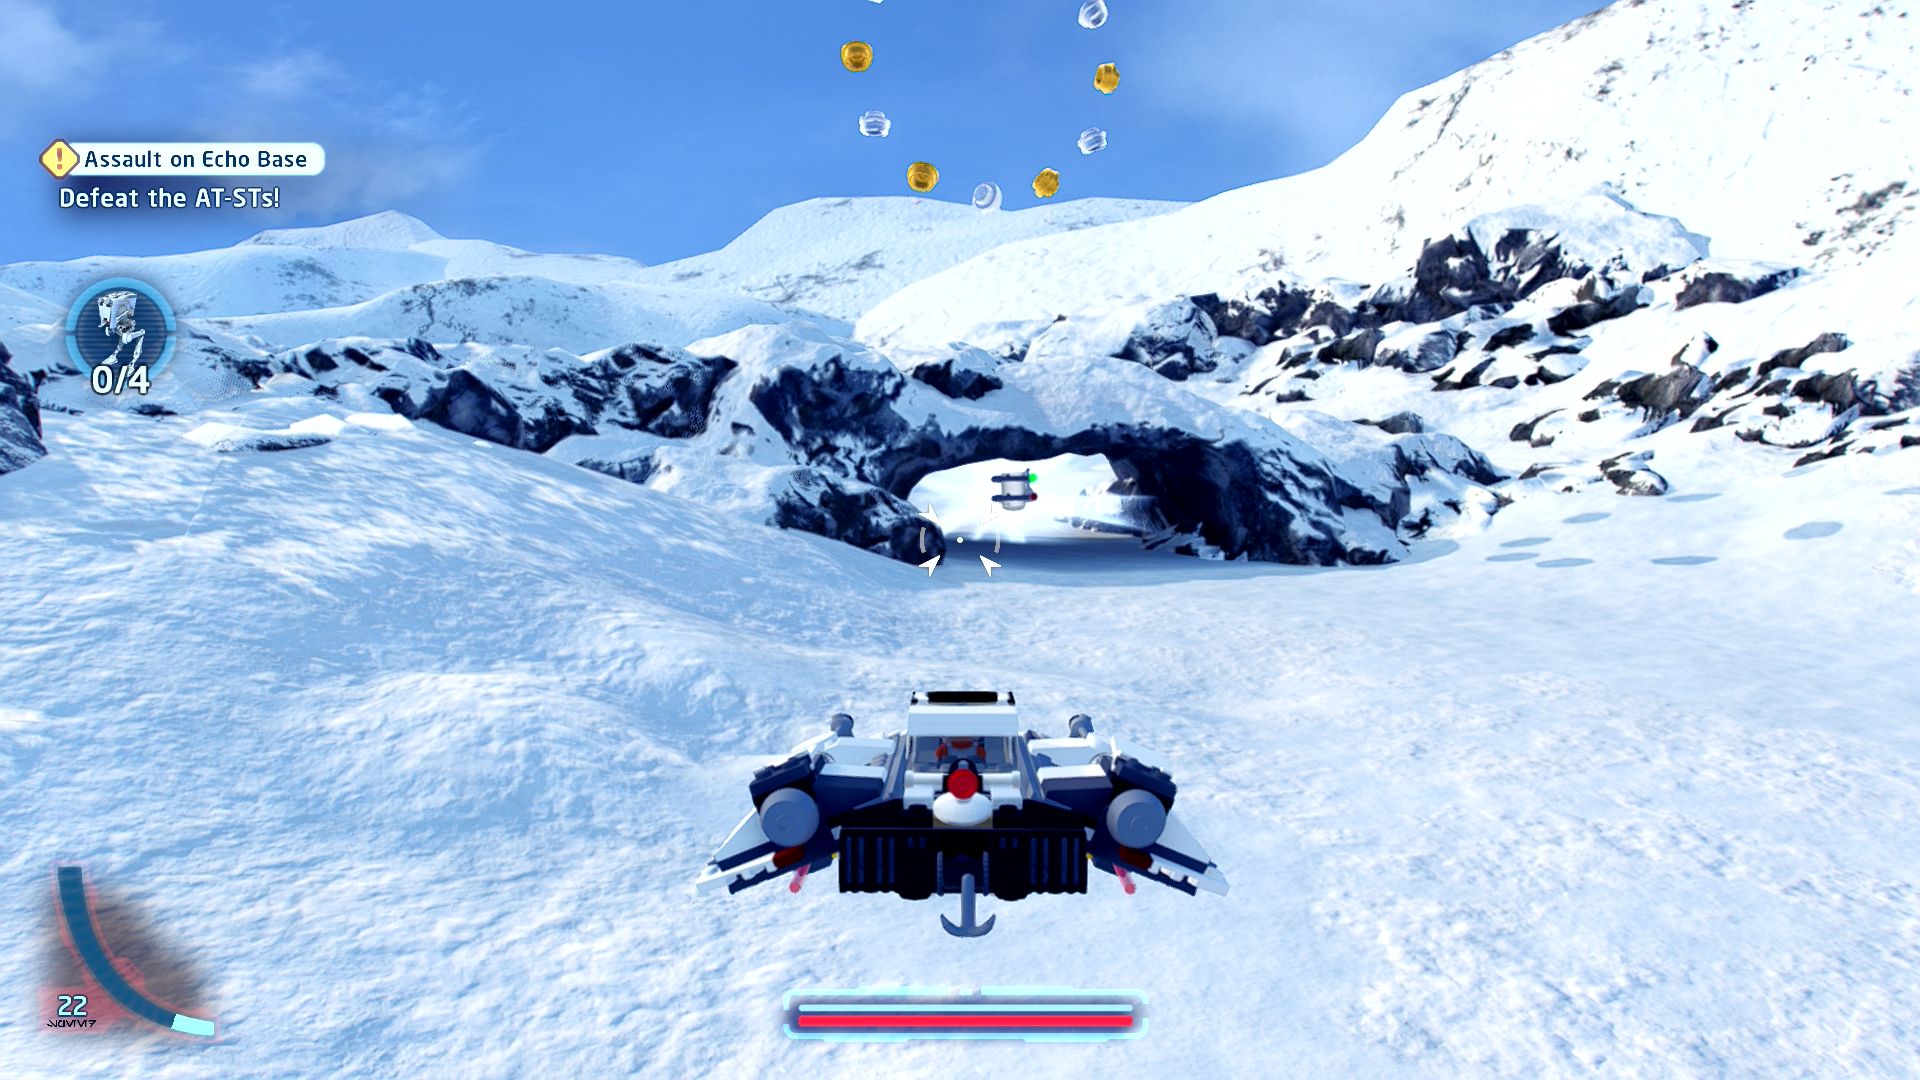
Sometimes these things are just lying around! Keep your eyes peeled.
On the right at the start of the level underneath an arch.
Minikit 5/5 - Probe-ation
Requires: None Story Mode: Yes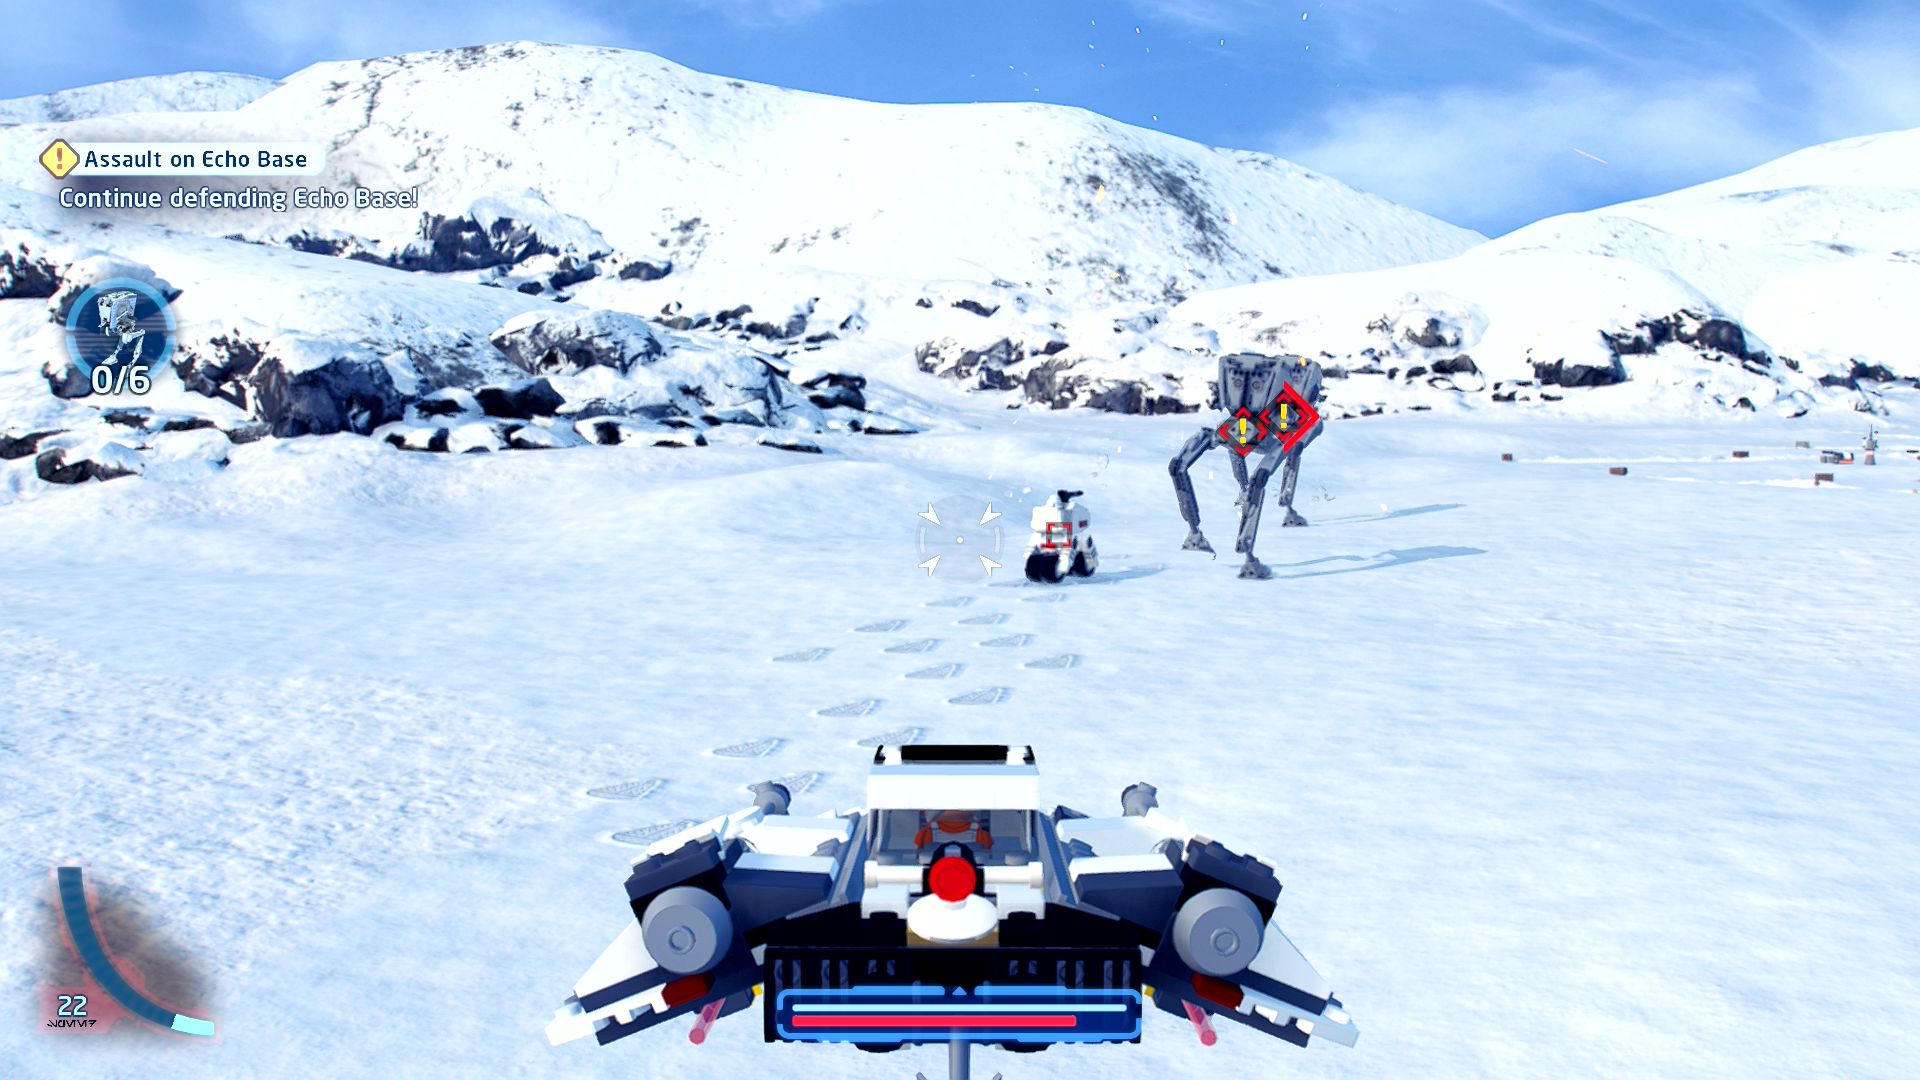
These sneaky MTV-7's are still surrounding the area. Deal with them!
Six smaller wheeled vehicles will attack with the AT-STs at the start of the level and during the AT-AT fights at the end. Plenty of opportunities to get six.
Imperial Star Destroyer

Based on set 75033
Star Destroyer
Episode V
THE EMPIRE STRIKES BACK
The story so far...
- The EMPIRE successfully located
- the rebel's base on Hoth, sending
- several AT-ATs to lead the
- assault.
- Hurriedly, the rebels jumped in
- their fighters and met the Empire
- over the snowy plains of Hoth. It
- was pretty.... wait for it....
- COOL. However, despite taking
- down a number of the AT-ATs the
- rebels could not stop the full
- advance of the Empire. Not so
- cool.
- Back in Echo Base, Han Solo
- desperately leads Leia Organa to
- the Millennium Falcon in a bid to
- escape....
Hoth, Echo Base
Echo Base Escape!
[Escape to the Millennium Falcon in the Echo Base hangar.]
If you try to run directly south to the Falcon the tunnel will collapse forcing you to turn around and go a longer way. Loop round westwards and on the south turn a few Snowtroopers will appear behind some cover. Blast through them and continue south past Darth Vader and more Snowtroopers.
Keep following the markers south past more and more Snowtroopers until you finally reach the level start point.
Chapter 3
Never Tell Me the Odds
| Silver | Blue | Purple |
|---|---|---|
| 10,000 | 20,000 | 30,000 |
[Defeat the pursuing TIE Fighters!]
The beginning part of the level features two enormous Star Destroyers but your task to begin with is simply to shoot down 10 TIE Fighters.
[Weaken the enemy ships and wait for a chance to escape.]
Now it's time to take on the Star Destroyers. Regular shots won't affect the turrets or radars, you'll need to collect torpedoes to blow them up. Torpedoes drop from the TIE Fighters with a purpley tail, so get to shooting at them when you spot them. You only need to destroy 10 turrets/dishes so you could stick to hanging out near just one of the Star Destroyers if you want.
[Escape from the Empire!]
In this section you just fly forwards avoiding the asteroids and shooting the occasional TIE Fighter that pops up. Once you get close to the marker you'll fly down and skim along the surface of a larger asteroid. Keep to the trench and after a while you'll complete the level.
Level Challenges
- Asteroid Evasion
- Avoid contact with the asteroids during the asteroid chase.
- Be extra careful, try not to go too fast.
- Proton Power
- Destroy 5 TIE Fighters using Proton Torpedoes.
- During the part where you're supposed to be blowing up turrets and radar dishes instead use the torpedoes on TIE Fighters.
- Take Evasive Action!
- Complete the Star Destroyer encounter without being destroyed.
- Avoid smashing into the side of the Star Destroyers and focus on getting torpedoes and quickly using them. Hitting the lines of four turrets often causes a chain reaction that blows up all four at once.
Minikit 1/5 - Rock Steady
Requires: None Story Mode: Yes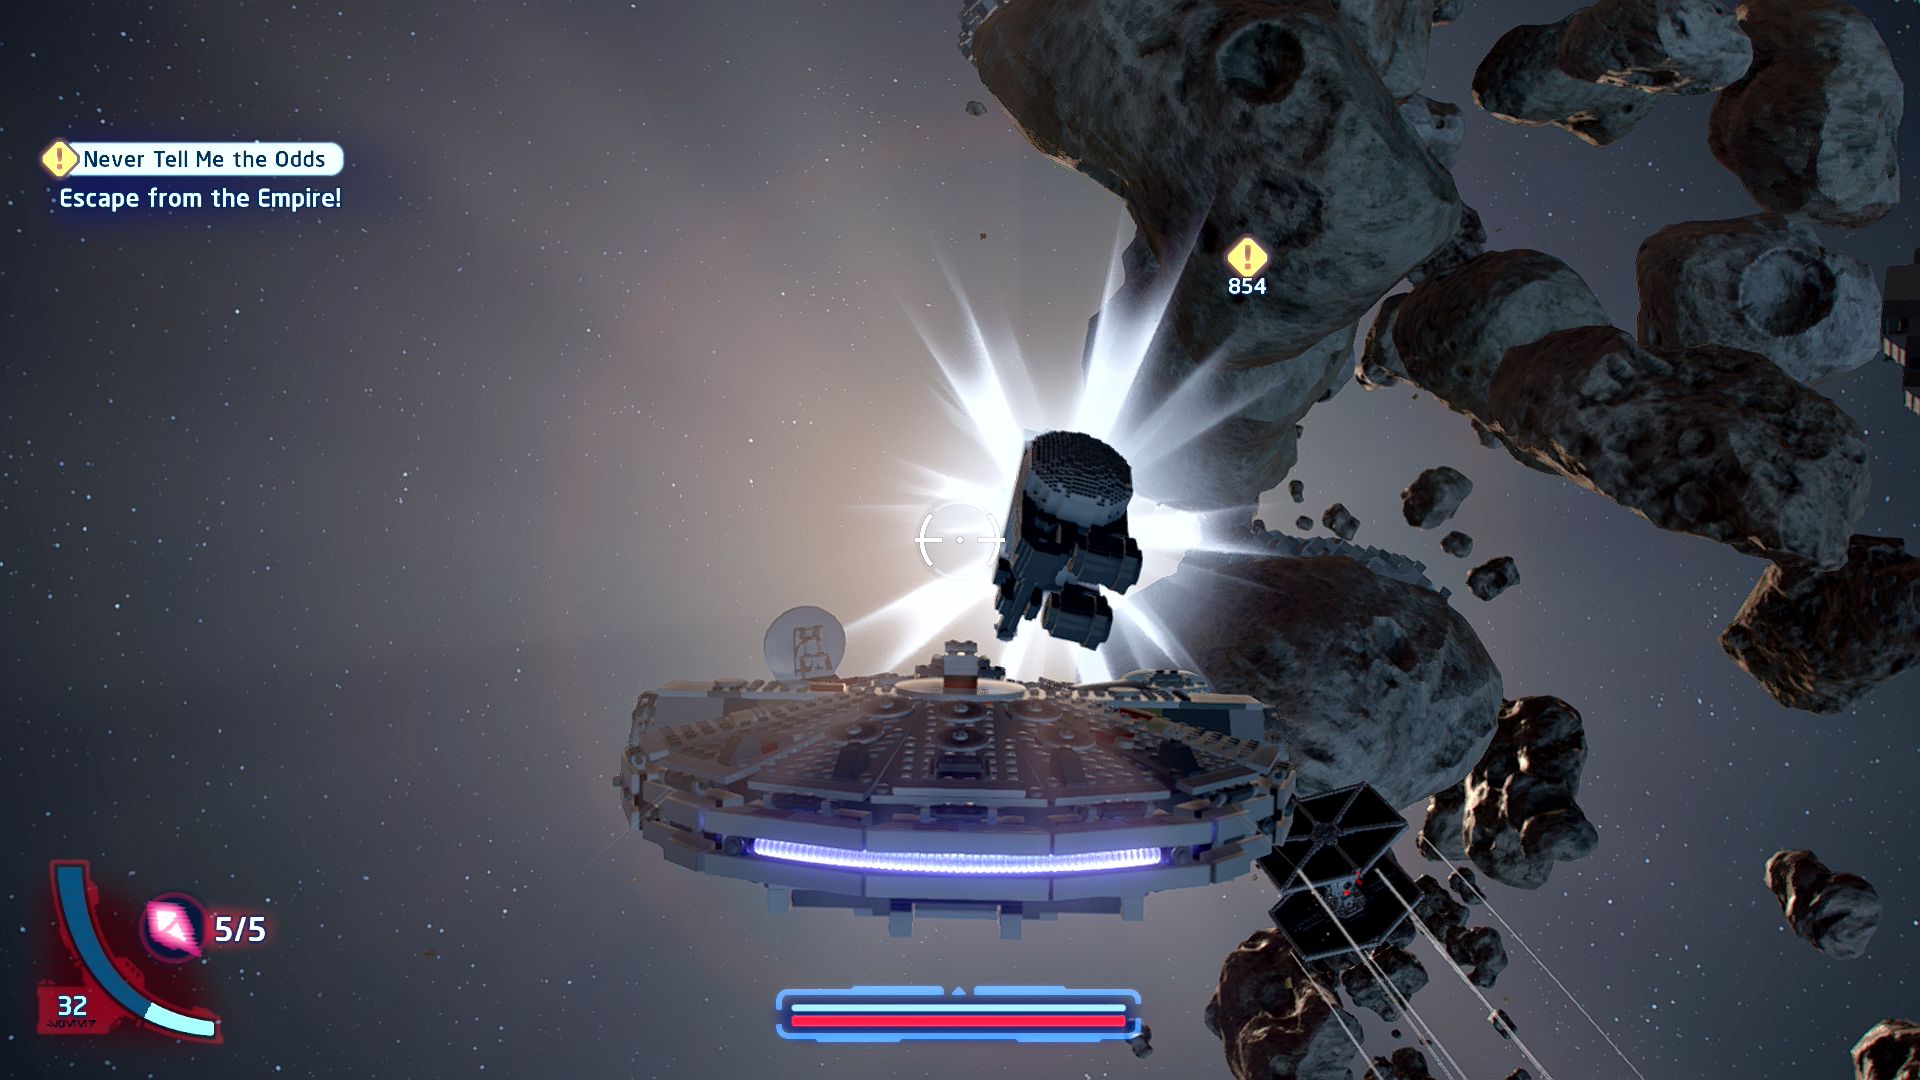
There's often oddly-shaped asteroids within these fields...
There are five slightly larger than normal brick built glowing minikits in the asteroid field, shoot them all to collect one minikit.
Minikit 2/5 - They Can't Have Disappeared
Requires: None Story Mode: Yes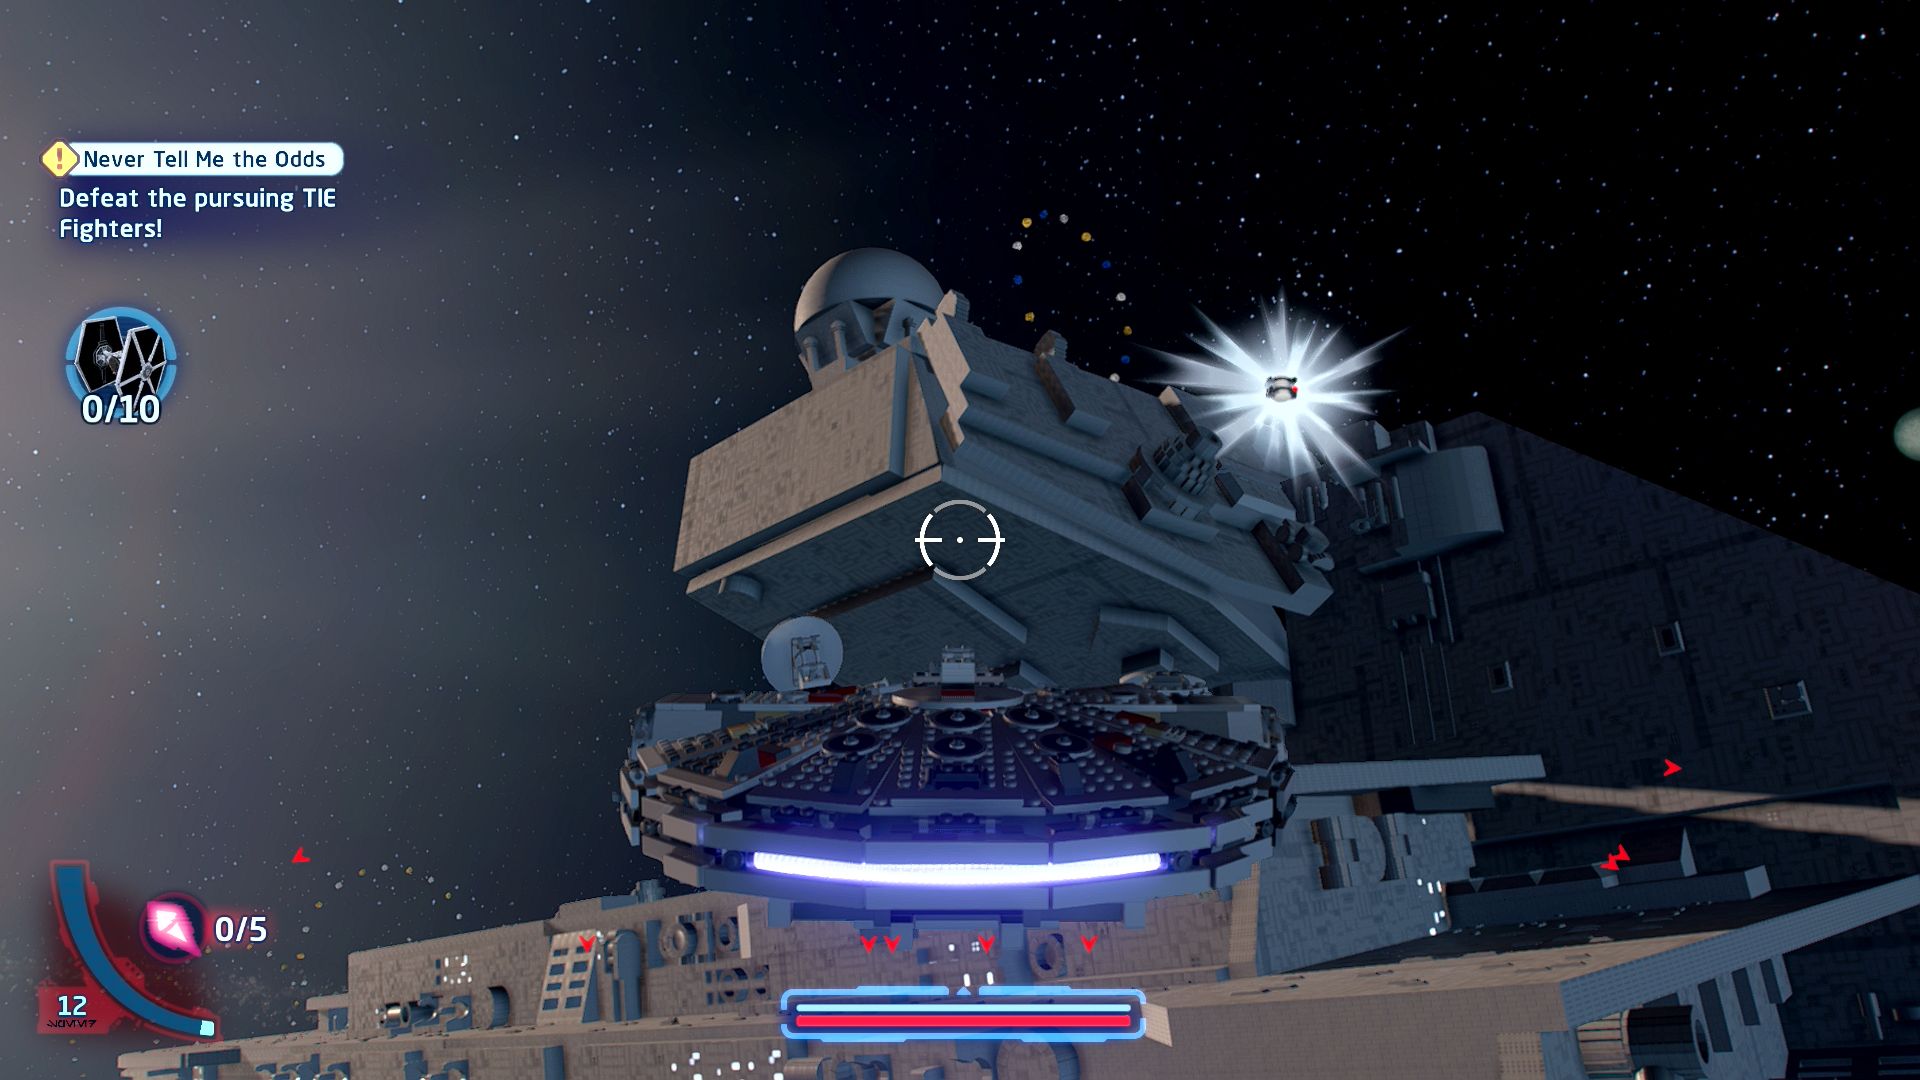
Hidden in plain sight...
On the back of the control tower of the first of the Star Destroyers you face at the start of the level.
Minikit 3/5 - Imperial Space Race
Requires: Free Play Story Mode: No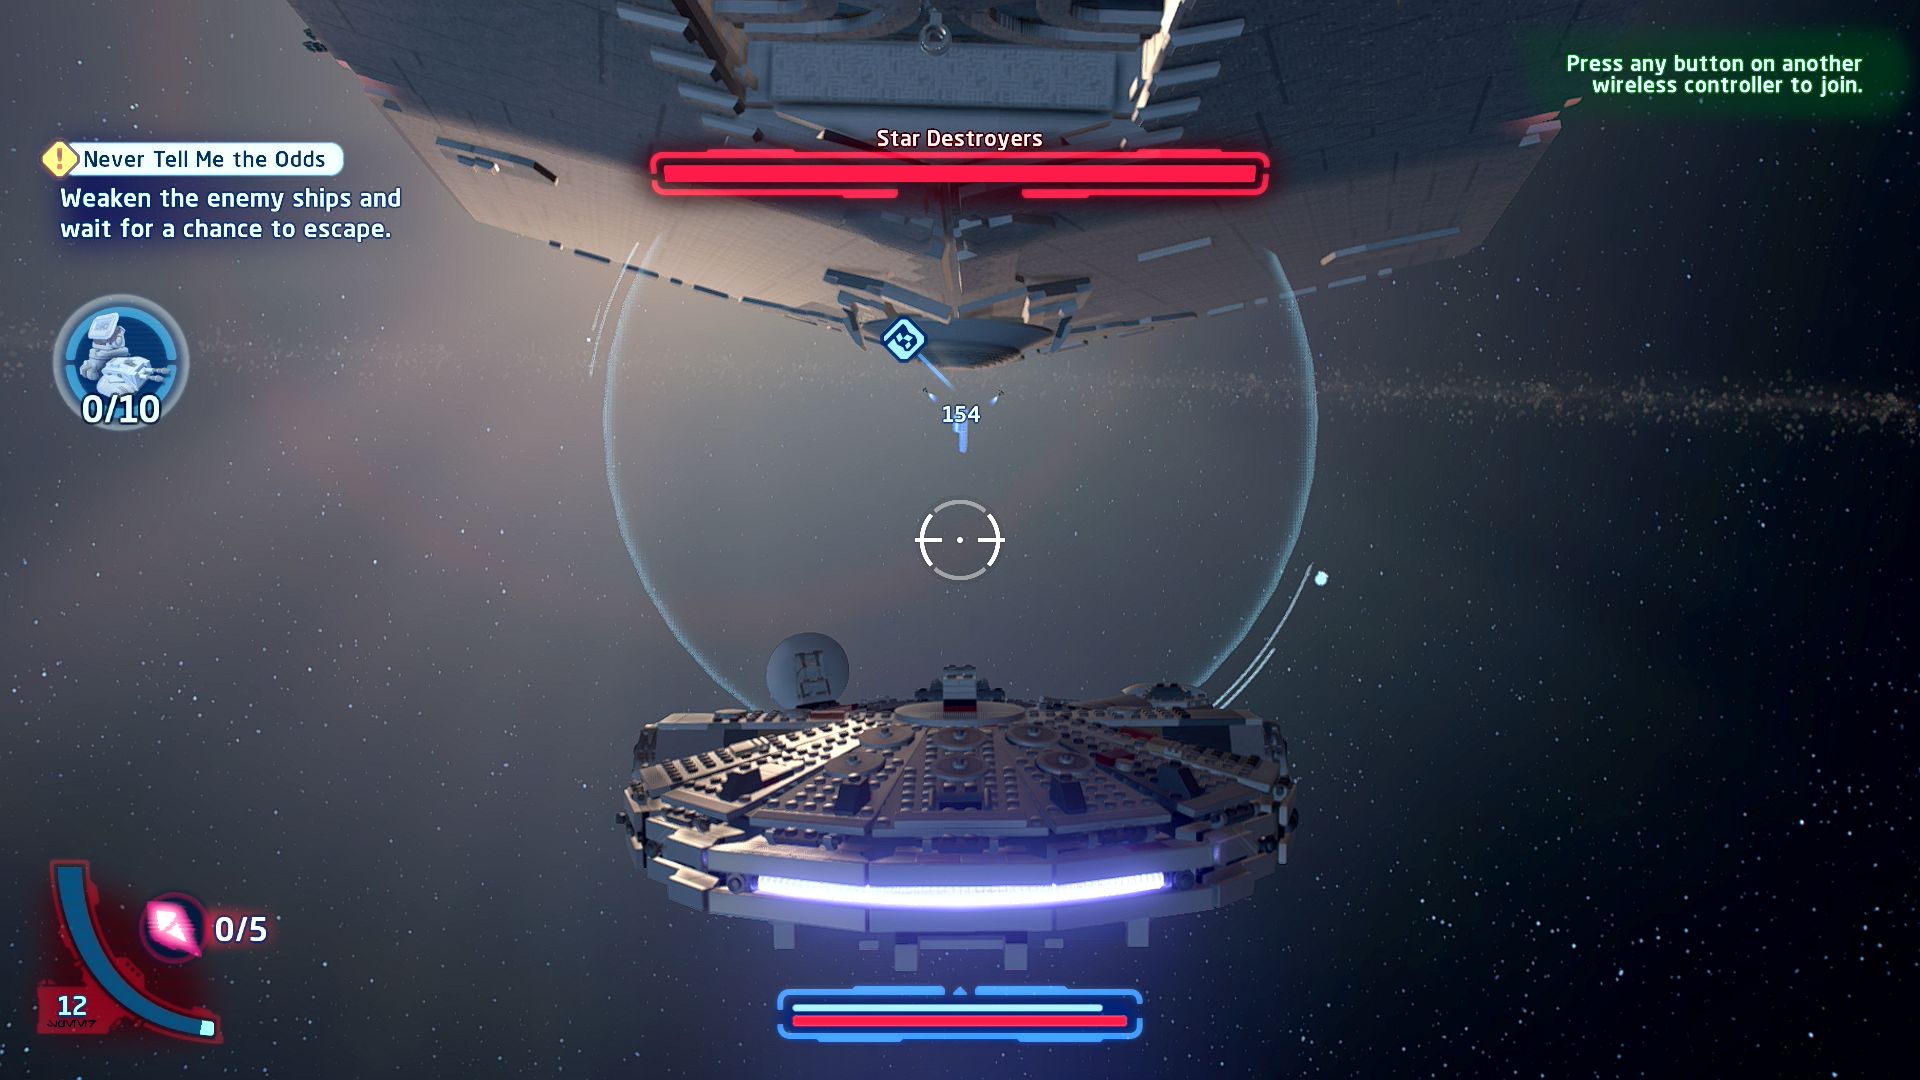
Race against the clock!
In Free Play there is a race you can start while flying around the Star Destroyers. It appears underneath the third Star Destroyer when it shows up. Make sure to double tap and then hold accelerate to go faster.
Minikit 4/5 - Avoid the Asteroid
Requires: Story Mode: Yes
Only a skilled pilot can reach this one!
Sitting out there in the asteroid field right near the end just before the fifth "Rock Steady" minikit asteroids.
Minikit 5/5 - Exogorth Leftovers
Requires: Story Mode: Yes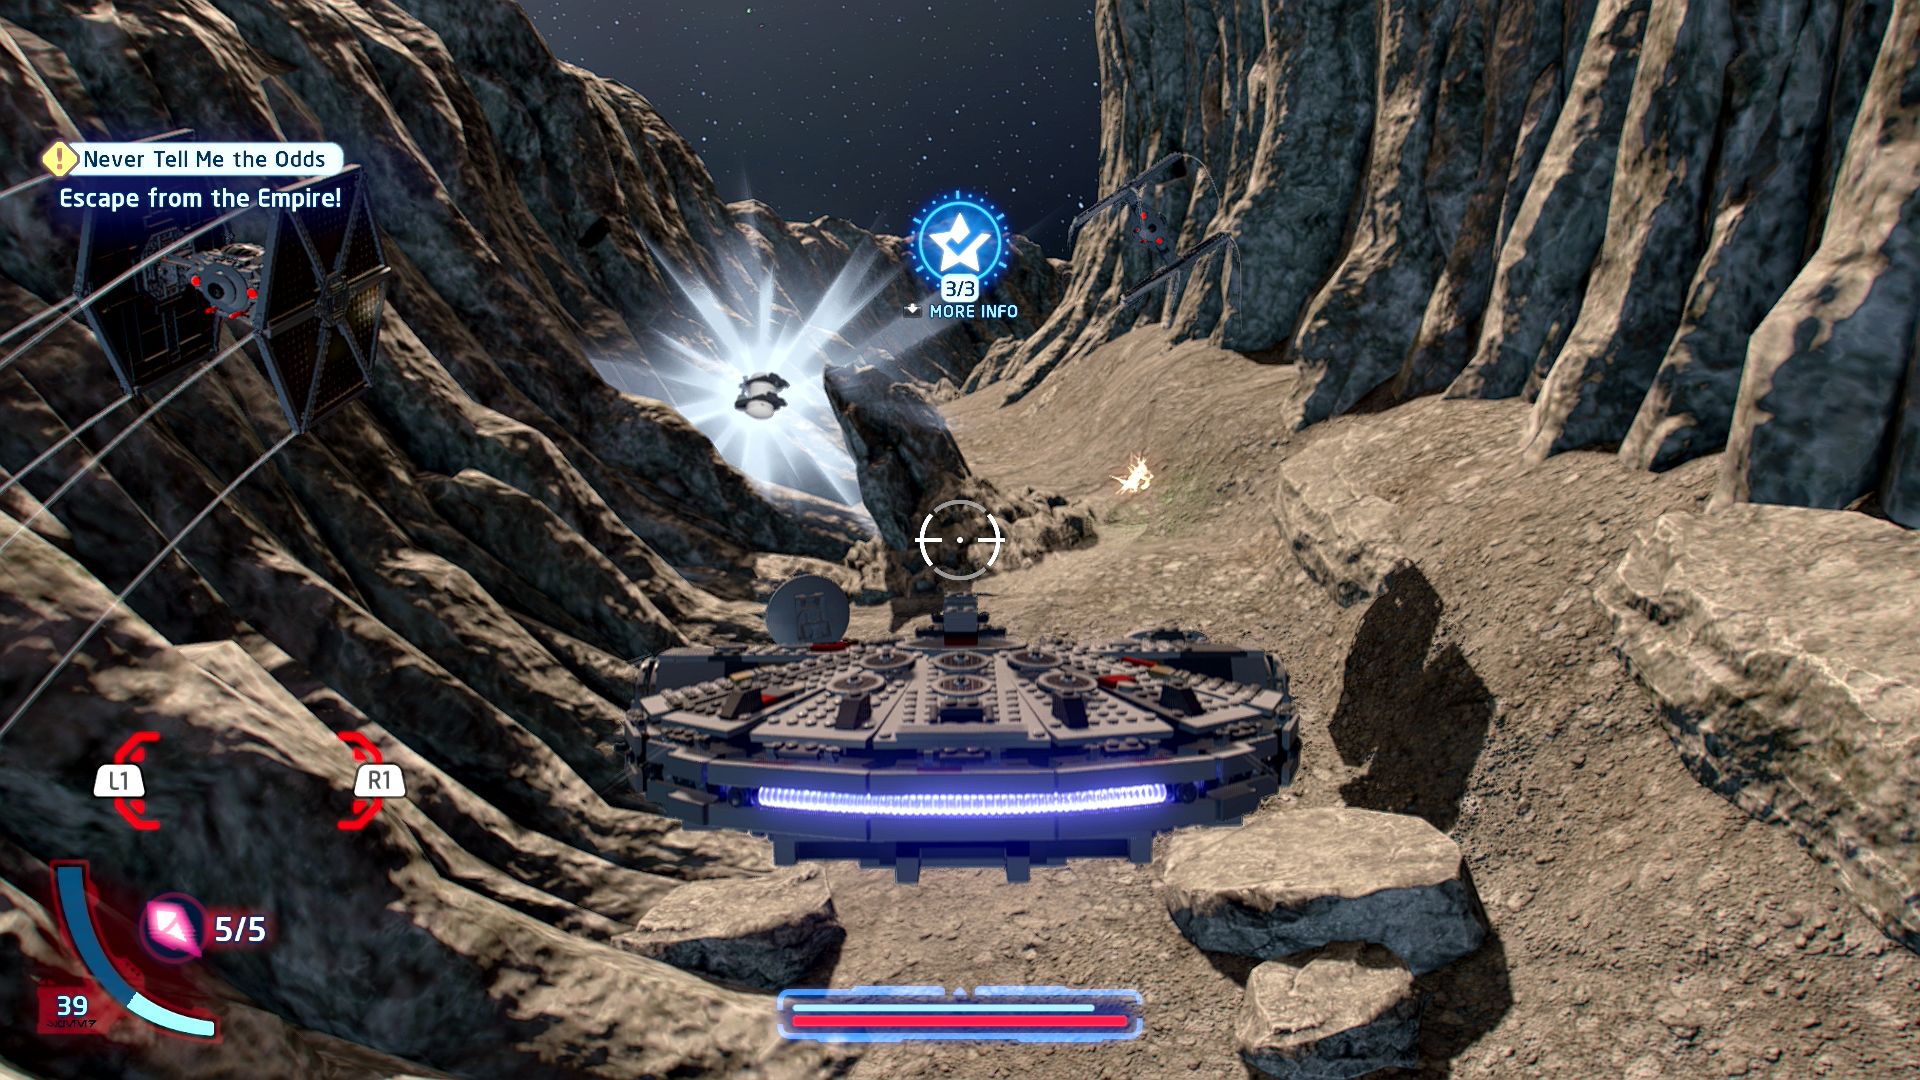
Space slugs usually eat everything... Maybe they're allergic to minikits?
In the trench when you fly along the surface of an asteroid at the end.
Imperial TIE Bomber

Episode V
THE EMPIRE STRIKES BACK
The story so far...
- The Empire was victorious on
- Hoth. Han Solo, Leia Organa, and
- Chewbacca fled in the Millennium
- Falcon but didn't fully escape the
- Empire's reach.
- Without a working hyperdrive
- and pursued by Star Destroyers,
- Han and Chewbacca's piloting
- skills were pushed to their limits.
- But after the Kessel run, this was
- a piece of cake.
- Han was able to outmanoeuvre
- them and fled through an asteroid
- field, eventually landing on a large
- asteroid in a bid to lay low....
Hoth Space
Jedi Master Yoda
[Travel to Dagobah to find Jedi Master Yoda.]
Open up your galaxy map and select Dagobah.
Dagobah Space
Fly towards the marker and continue the story.
Dagobah
[Set up camp.]
Grapple pull open the two crates on the shore to get the bricks you need to assemble the camp.
[Sleep at the camp.]
Enter the marker to continue the story.
[Complete Master Yoda's training course.]
The training is going to be an obstacle course, head north and hop along some tiny circles in the water to the other side. Over there is a crate you can use the Force on to pick up and place on a special spot next to the tree. Pick up the second nearby crate and put it on top of the first so you can use them to jump up into the tree.
Once you're in the tree jump up the handles and then swing across to a second tree, this one with twirl poles to jump up. There's more platforming and vine swings ahead before going down a zipline to complete the obstacle course.
The Cave of Evil
[Explore the mysterious cave.]
Walk forwards into the glowing cave entrance and move towards the middle of the cave.
[Defeat Darth Vader!]
Time for a quick boss fight! It's a load of lightsaber fighting, tap the buttons that come up on screen when you come together for a clash and then get some damage in while Vader's charging up his red circle attacks. Finish him off with another clash.
Bespin Space
A Safe Port
[Land on Bespin.]
Fly straight on towards the marker to continue the story.
Cloud City
[Follow Lando Calrissian.]
Follow Lando Calrissian inside.
[Speak to Lando Calrissian.]
Speak to Lando Calrissian to start the next level at last.
Chapter 4
Hibernation Station
| Silver | Blue | Purple |
|---|---|---|
| 33,333 | 66,666 | 100,000 |
[Catch up to the bounty hunter!]
There are a few different ways through this level, most of the shortcuts require you to be a villain so if you want to try some of them make sure to outfit Leia in a full Stormtrooper outfit. I'll direct the walkthrough along the main path though. There are also some people trapped in cages around the level, if you free them they'll join you and assist with fighting.
Take a left ahead and defeat a few Stormtroopers before advancing down the corridor a short distance. In the next room you'll see some more Stormtroopers this time with vision cones marked in front of them. This indicates that you can try to sneak past them if you feel like it, or you can just attack them straight away.
Keep on going westwards and take the first right. As you approach some more Stormtroopers facing the other way a few more will run around the corner and start attacking. Defeat them all then take a right at the end where they came from.
[Find a way to reach the Millennium Falcon.]
Going east around the curve towards the door that leads to the Millennium Falcon you'll spot a couple of Stormtroopers with vision cones standing next to the door. Sneak past them if you want and continue to the east.
At the laser grid use a grapple on the wall to pull out an object from the wall. Shoot the red glowing rod to disable the forcefield. Another Stormtrooper is standing guard for some prisoners on the other side.
Further ahead to the east is a room with several elevators. Defeat the enemies in there to get the keycard the officer will have kindly dropped for you.
With the keycard in hand go back to the door to the landing pad and open it. Walk outside and approach the Falcon.
[Defend Chewbacca while he repairs the Millennium Falcon!]
Shoot all the Stormtroopers that run out to attack and about two minutes later Boba Fett will turn up in his completely unnamed starship.
At this point the repair bar will stop moving until you deal with Boba, so ignore the Stormtroopers for the moment and shoot at Slave I instead. After a bit of damage he'll fly away and the bar will start filling again.
As you wait out the remaining minute of repair time Boba will fly back in to try to help the Stormtroopers so just keep shooting them and him until the bar is complete and you can run over to Chewbacca to finish the level.
Level Challenges
- You want to make that move?
- Build a distraction for the Stormtroopers.
- In the middle of the corridors on the western side of the level are some floating glowing carts. Smash them to get the parts to build a Dejarik Board, a Vader Hologram, or an AT-RT. Make the Dejarik Board to complete the challenge.
- Hello, What Have We Here?
- Discover and loot an Empire Weapon Cache as a disguised Rebel.
- There's a weapon cache crate between the cages to the east of the door to the landing pad.
- Surprise!
- Trigger the secret defences on the Landing Pad.
- There are a few GNK Droids on the landing pad, put one on either spot to activate the defenses.

Minikits
Minikit 1/5 - Infernal Furnace
Requires: Protocol Droid Story Mode: Yes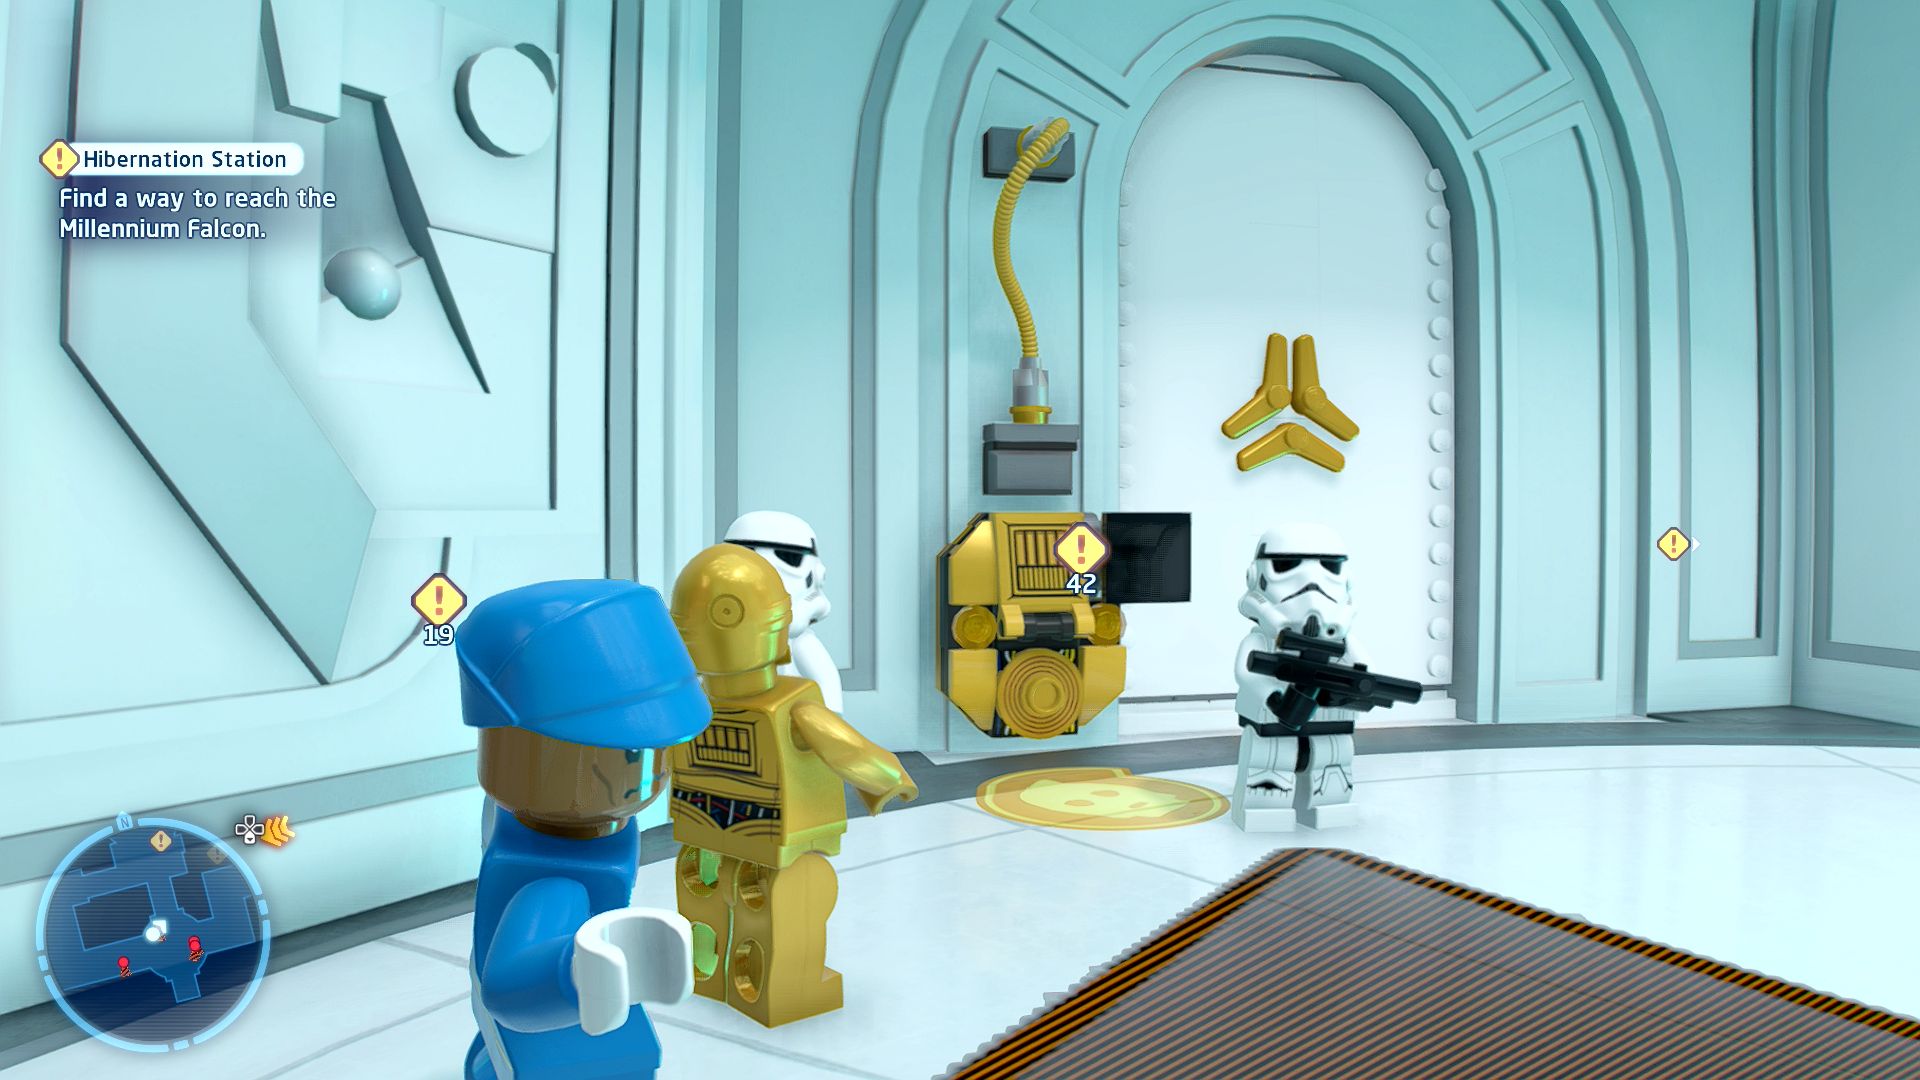
That pit droid could probably get you into the furnace room...
Just to the west of the start where there are some Stormtroopers with vision cones standing guard is a Protocol Droid Terminal that can be used to activate a Pit Droid inside the next room. Using it press the nearby button to open the door and let yourself in. Once inside smash the objects on the floor to get the bricks to build a motor for the conveyor belt. Clear the obstruction and a minikit will pop out.
Minikit 2/5 - Small Systems Secret
Requires: Astromech Droid Story Mode: No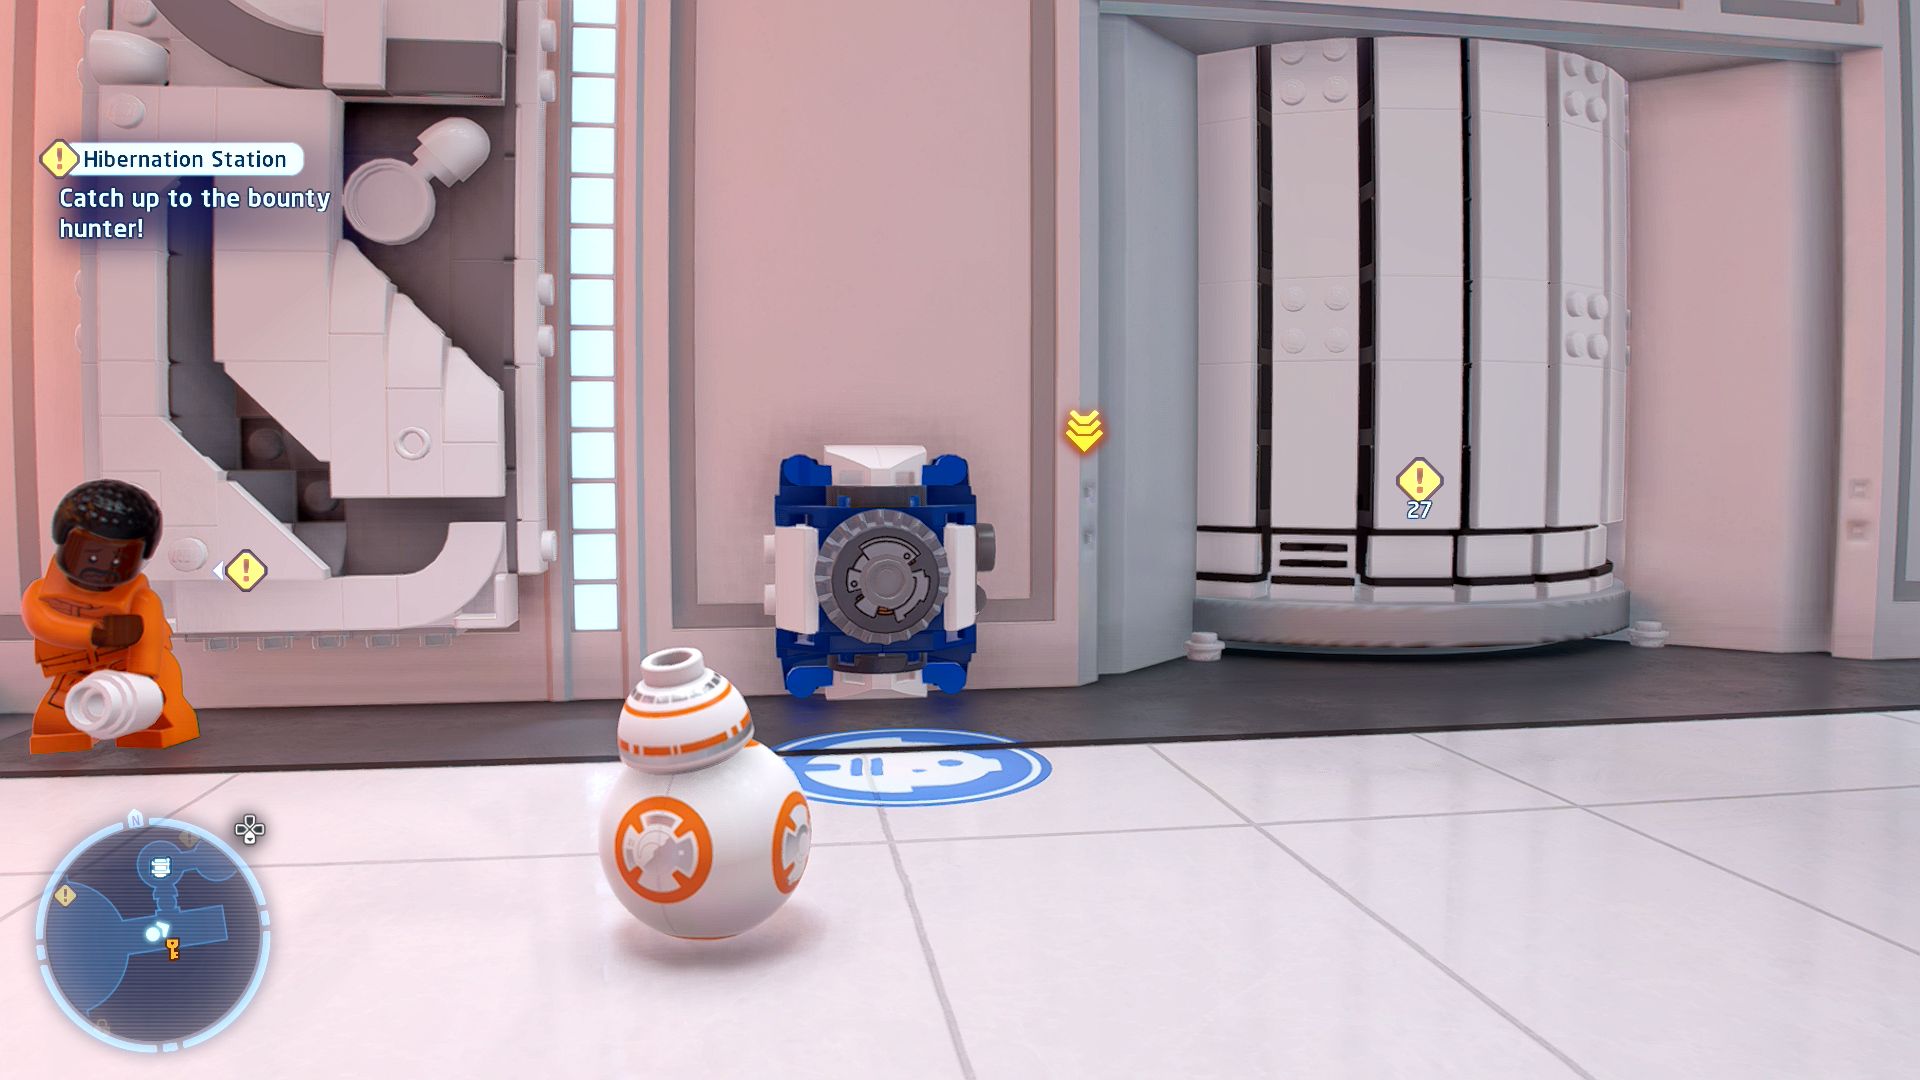
An astromech could slice its way into the small systems room...
On the eastern side of the level near where you get the dining room password is a section only reachable by solving an Astromech Socket. Once inside grapple an object off the wall to the right and then smash it to reveal a power cell. Pick it up and put it in the array on the wall opposite the entrance to release the minikit.
Minikit 3/5 - Lofty Lift Lever
Requires: None Story Mode: Yes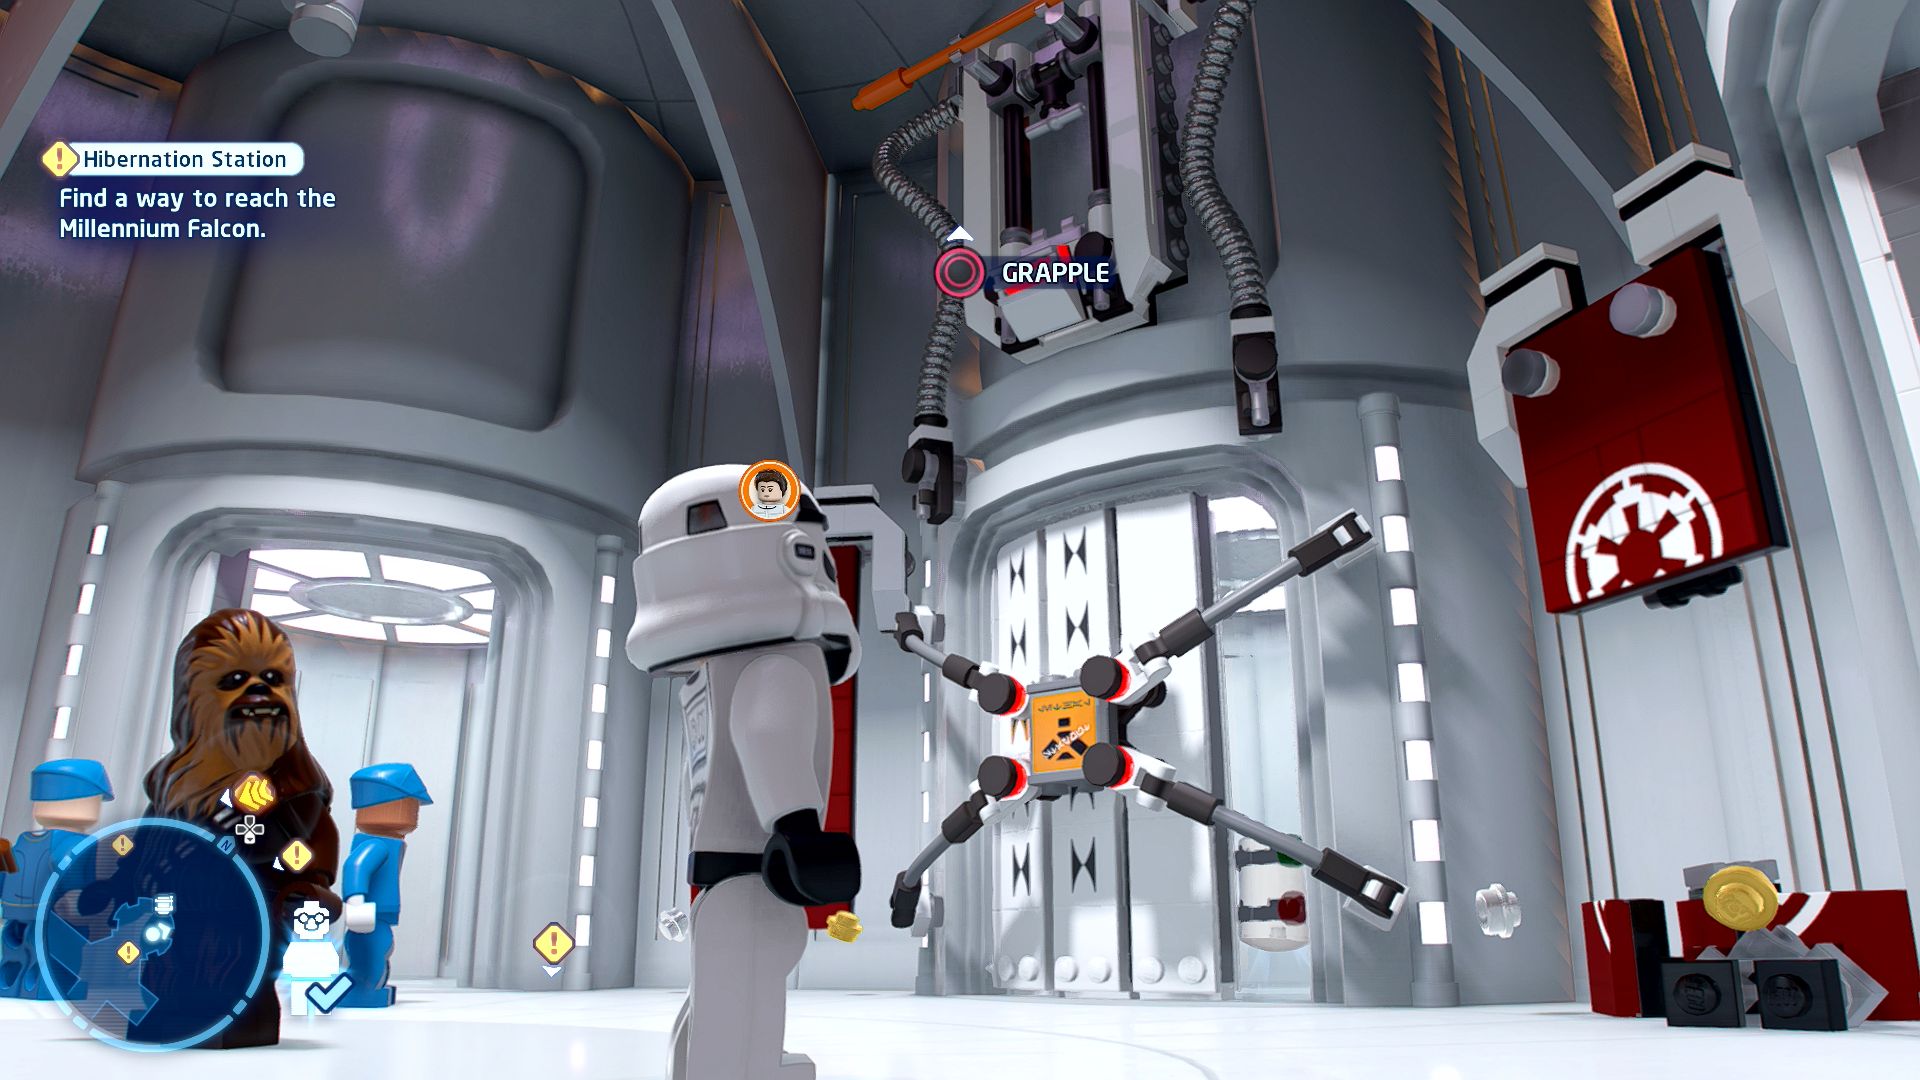
The override lever for lifts are usually found high up inside them!
In the elevator room in the north-east corner of the level you can either smash all the items in the room and build a trampoline out of them that you can use to jump to a lever above the broken lift that will open it for you. Or you can just grapple straight up to it. Also smash the barrier on the lift.
Minikit 4/5 - Sightseeing Stormtrooper
Requires: Hero Story Mode: Yes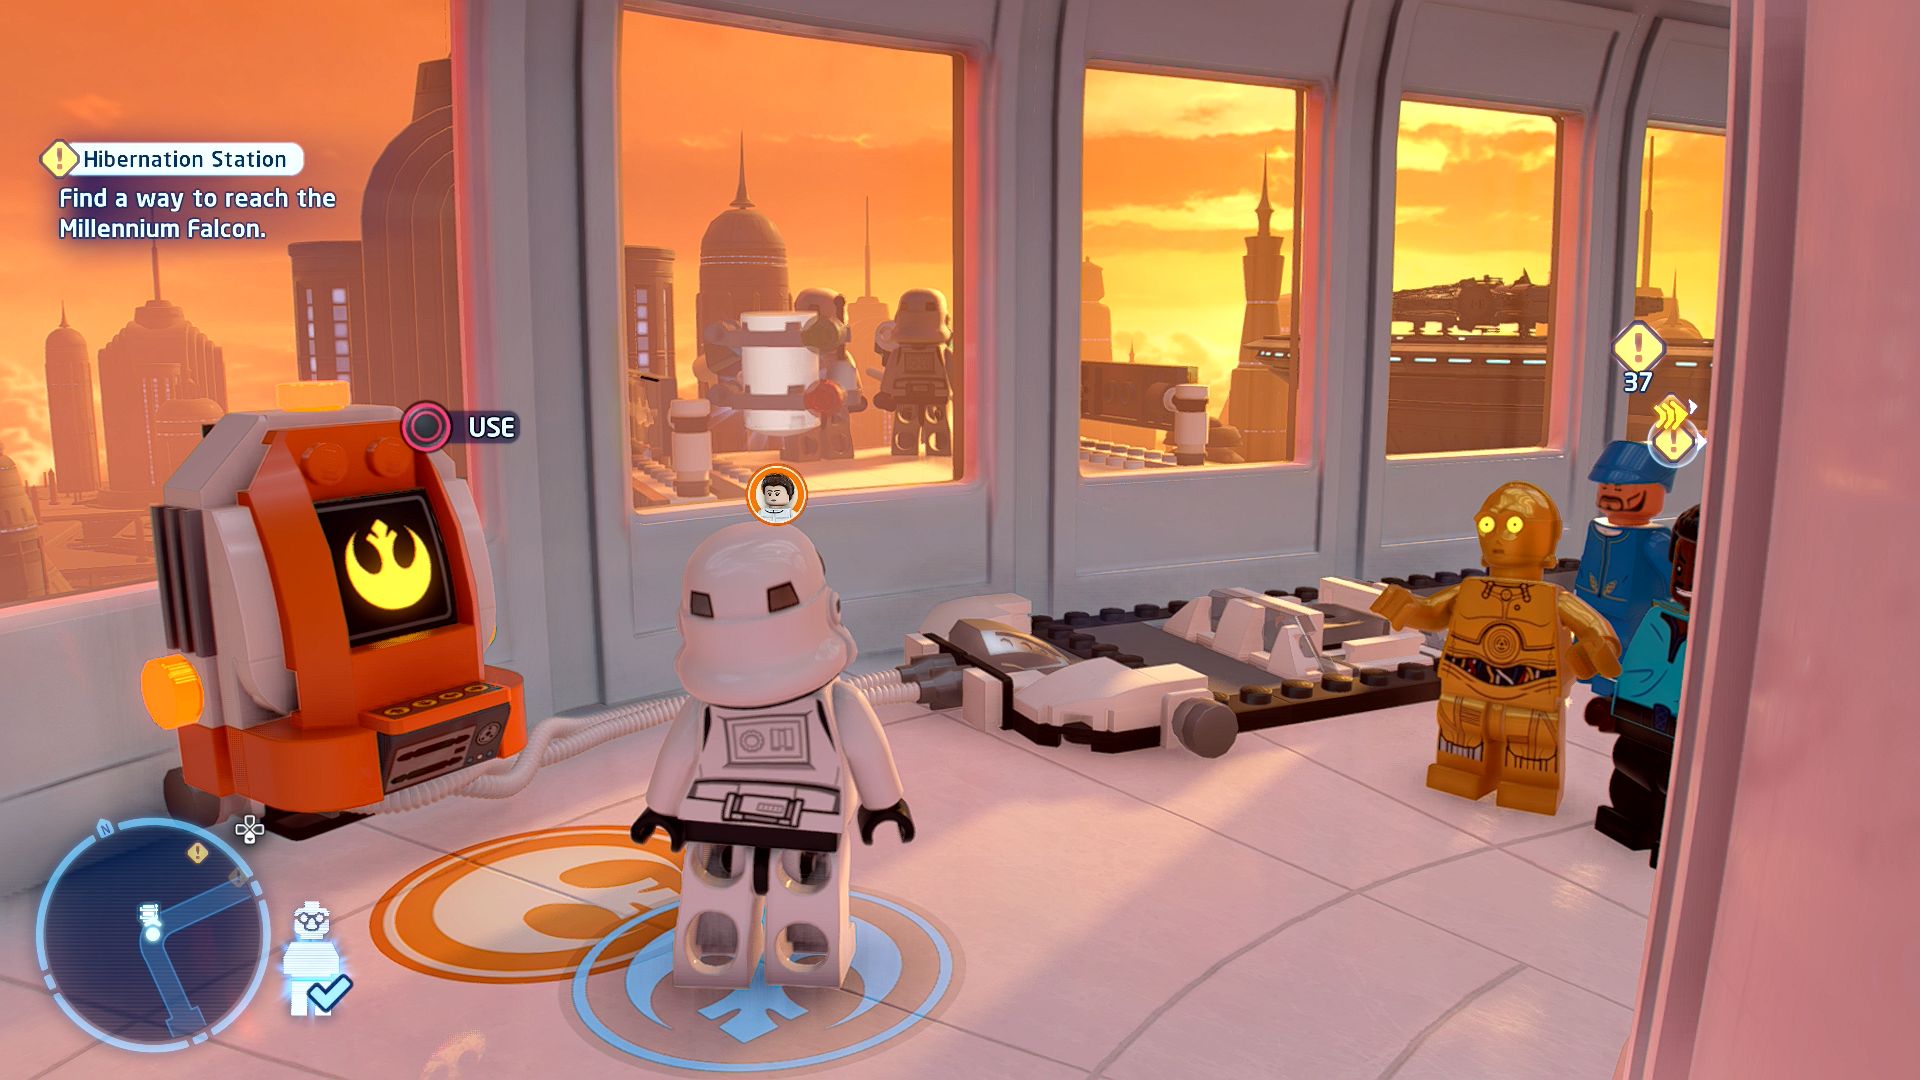
The stormtroopers are distracted... Now's your chance to snag that minikit!
In the northwestern corner of the level is a Hero Terminal that you can activate to bring up a pushable block. Pushing that will move the platform outside the window along and when you reach the end of the track the window will flip and bring the minikit inside for you.
Minikit 5/5 - Password Puzzle for Peckish People
Requires: Protocol Droid Story Mode: Yes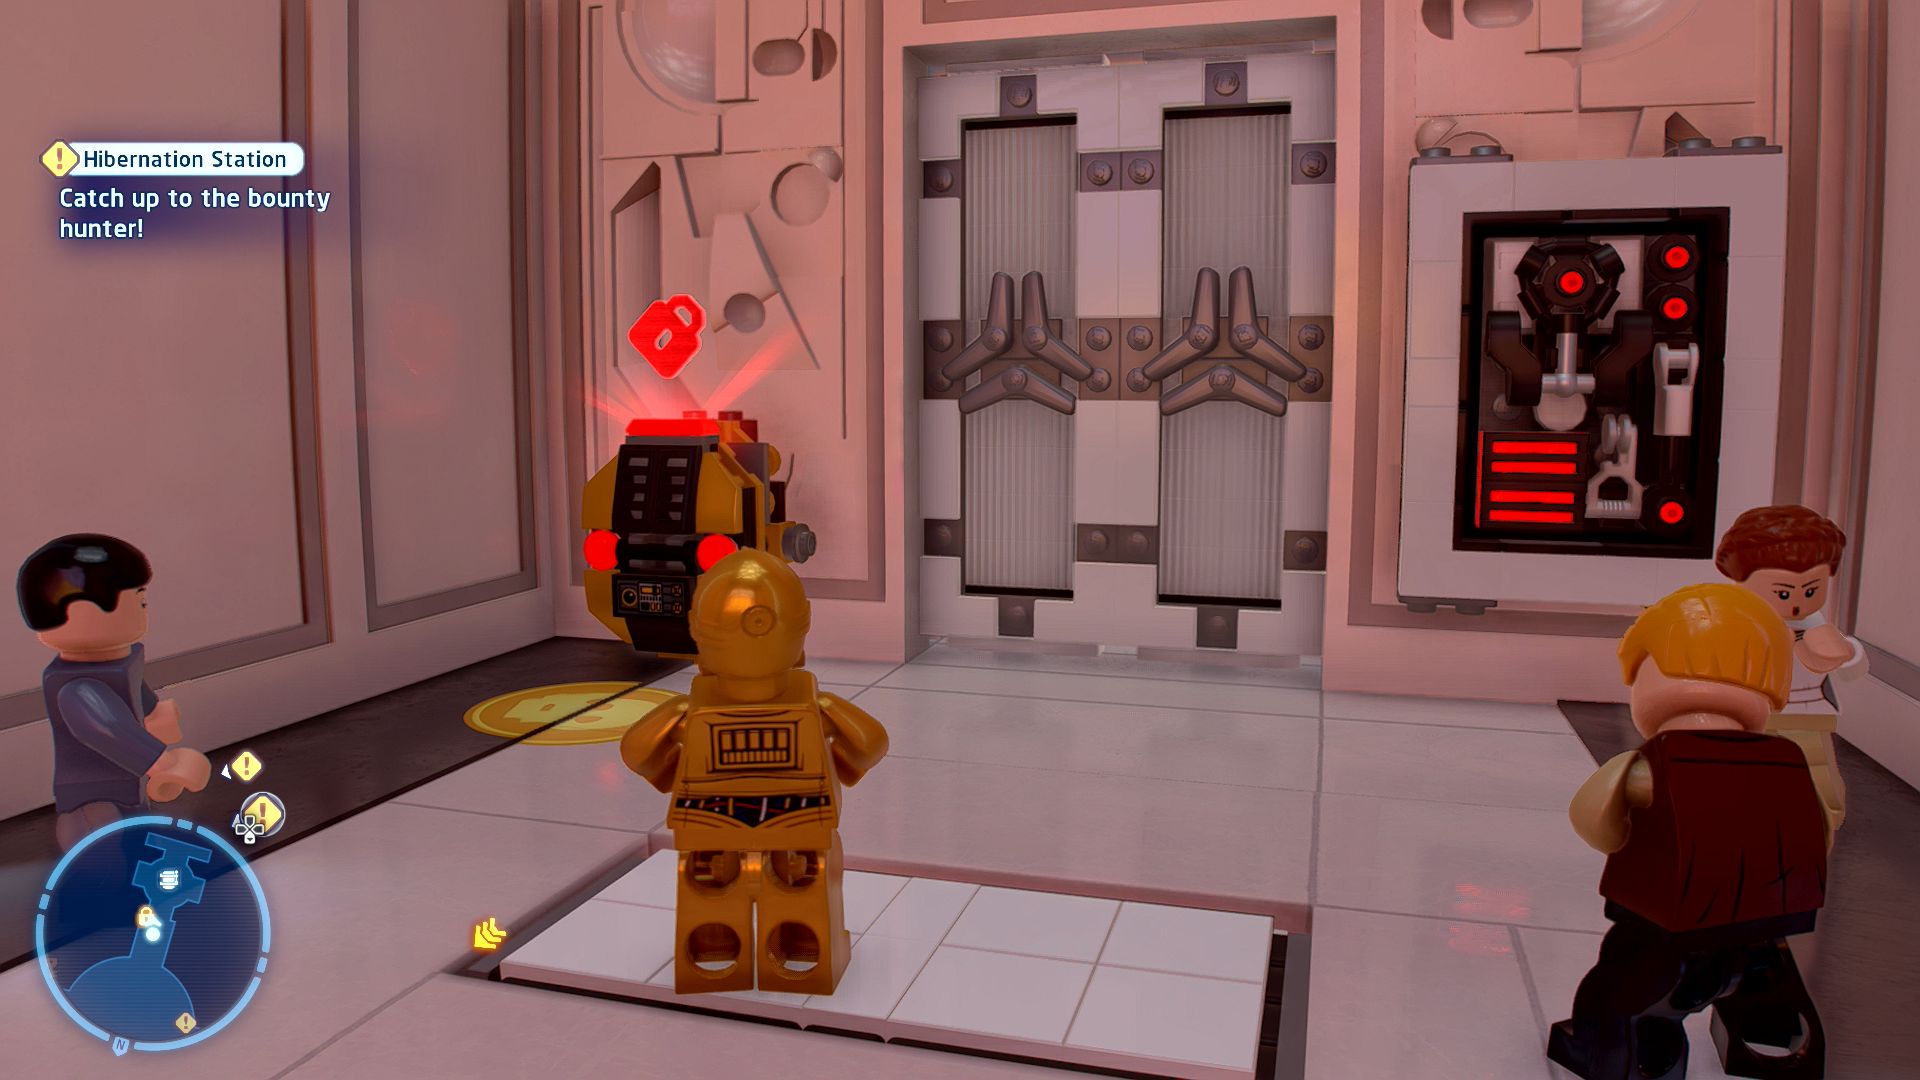
Looks like the dining room is locked up tight. The entry code must be nearby...
At the very start of the level is a Protocol Droid Password Entry Terminal, the Password Terminal that gives you the password is simply around the corner to the right. Come back and enter the Cloud City Dining Room password.
Boba Fett's Starship

Based on set CELEBVI
Boba Fett's Mini Slave I
| Cost | Character | |
|---|---|---|
|
|
- | Han Solo (Episode V) |
|
|
- | Lando Calrissian (Episode V) |
|
|
- | Leia (Cloud City) |
|
|
- | Leia (Episode V) |
|
|
500,000 | Boba Fett |
|
|
200,000 | Boba Fett's Starship |
Episode V
THE EMPIRE STRIKES BACK
The story so far...
- After his SNOWBI-WAN KENOBI
- vision, Luke travelled to Dagobah
- to find Jedi Master YODA. Under
- his little green backpack's
- watchful eye, Luke began his Jedi
- training.
- Meanwhile, Han, Leia, and
- Chewbacca landed in CLOUD
- CITY to see Han's old friend about
- repairing the Falcon. Though
- LANDO CALRISSIAN wasn't such
- a good friend, after all, as he
- immediately sold them out to the
- Empire.
- Before ultimately intending to
- use it on Luke, Darth Vader froze
- Han Solo inside the Carbon
- Freezing chamber and handed
- him over to Boba Fett. Better late
- than never, Lando's conscience
- kicked back in, and he, Leia, and
- Chewbacca tried to stop Boba
- from leaving with Han, albeit
- unsuccessfully....
Dagobah
Friends in Need
[Raise the X-wing from the swamp.]
Walk a short distance forwards and use the Force to try to lift the X-wing out of the swamp.
[Use the X-wing to leave Dagobah.]
The level starter is next to the freed X-wing.
Chapter 5
Revelations!
| Silver | Blue | Purple |
|---|---|---|
| 33,333 | 66,666 | 100,000 |
[Defeat Darth Vader!]
We kick off this level with what is pretty much a repeat of the fight with the Darth Vader illusion. You start off with a clash, get knocked back down the stairs, and then can attack freely whenever you see an opportunity to do some damage moving out of the way whenever he tries to attack you back.
[Shut down the Carbon-freezing chamber.]
Once you have depleted his first health bar Luke will get knocked into the carbon-freezing chamber, it's up to R2-D2 to use the nearby Astromech Socket to switch it off and rescue him.
[Defeat Darth Vader!]
It's a quick lightsaber clash to knock Vader off the platform where he will then run off down a pipe.
[Find Darth Vader in the processing vane.]
Smash all the debris out the way and activate the Astromech Socket next to the side pipe so you can progress down there. At the end of the pipe use the Force to put the power cell into the socket on the left.
Out of the pipe stand on the red button while R2-D2 grapples up to the bar on the wall to the left of the next pipe leading west. Slide down that pipe to the next section.
Look around the room, if you go down either corridor Vader will show up to corner you there.
[Defeat Darth Vader!]
Lightsaber clash and then fight him as before. At about 50% health he will run over to a window and start throwing objects at you. After fending off a few of them approach him for another clash and then you'll be able to start damaging him again.
When that health bar is fully gone you'll perform another lightsaber clash and then get blown out the window, tap the buttons on screen to try to keep your grip but you'll fail.
[Find Darth Vader in the processing vane.]
Go to the right (south) to where the platform ends, on the wall you should see some green glowing footprints that indicate a Jedi (or Sith or Scavenger) can run along the wall to get to the other side, jump towards it and you should trigger that. Or you can have R2-D2 grapple the platforms down individually. If Luke goes first press the button on the other side to lower the platforms.
The next blockage is solved by use of R2-D2's grapple, pull down the platform and continue south towards the next confrontation with Vader. At the end go up the steps and inside the building. There are four doors in here, Vader is behind the northeast one.
[Defeat Darth Vader!]
Follow Darth back outside and onto the iconic platform where you'll engage in another lightsaber clash followed by some regular fighting and then one last clash to finish off the episode.
Level Challenges
- Force Feedback
- Force Throw 3 separate objects at Darth Vader.
- You can do this in any of the three fights with Vader.
- Most Impressive
- Complete the level in under 10 minutes.
- It's a fairly short level so as long as you stay focused it shouldn't be too much of a pain.
- Ugnaught-y
- Find all of the hidden Ugnaughts throughout the level.
- The "hidden" Ugnaughts seem to include the Ugnaughts in the left pipe and the Ugnaughts in the room opposite where you find Vader at the end of the level.

Minikits
Minikit 1/5 - Carbon Copy
Requires: None Story Mode: Yes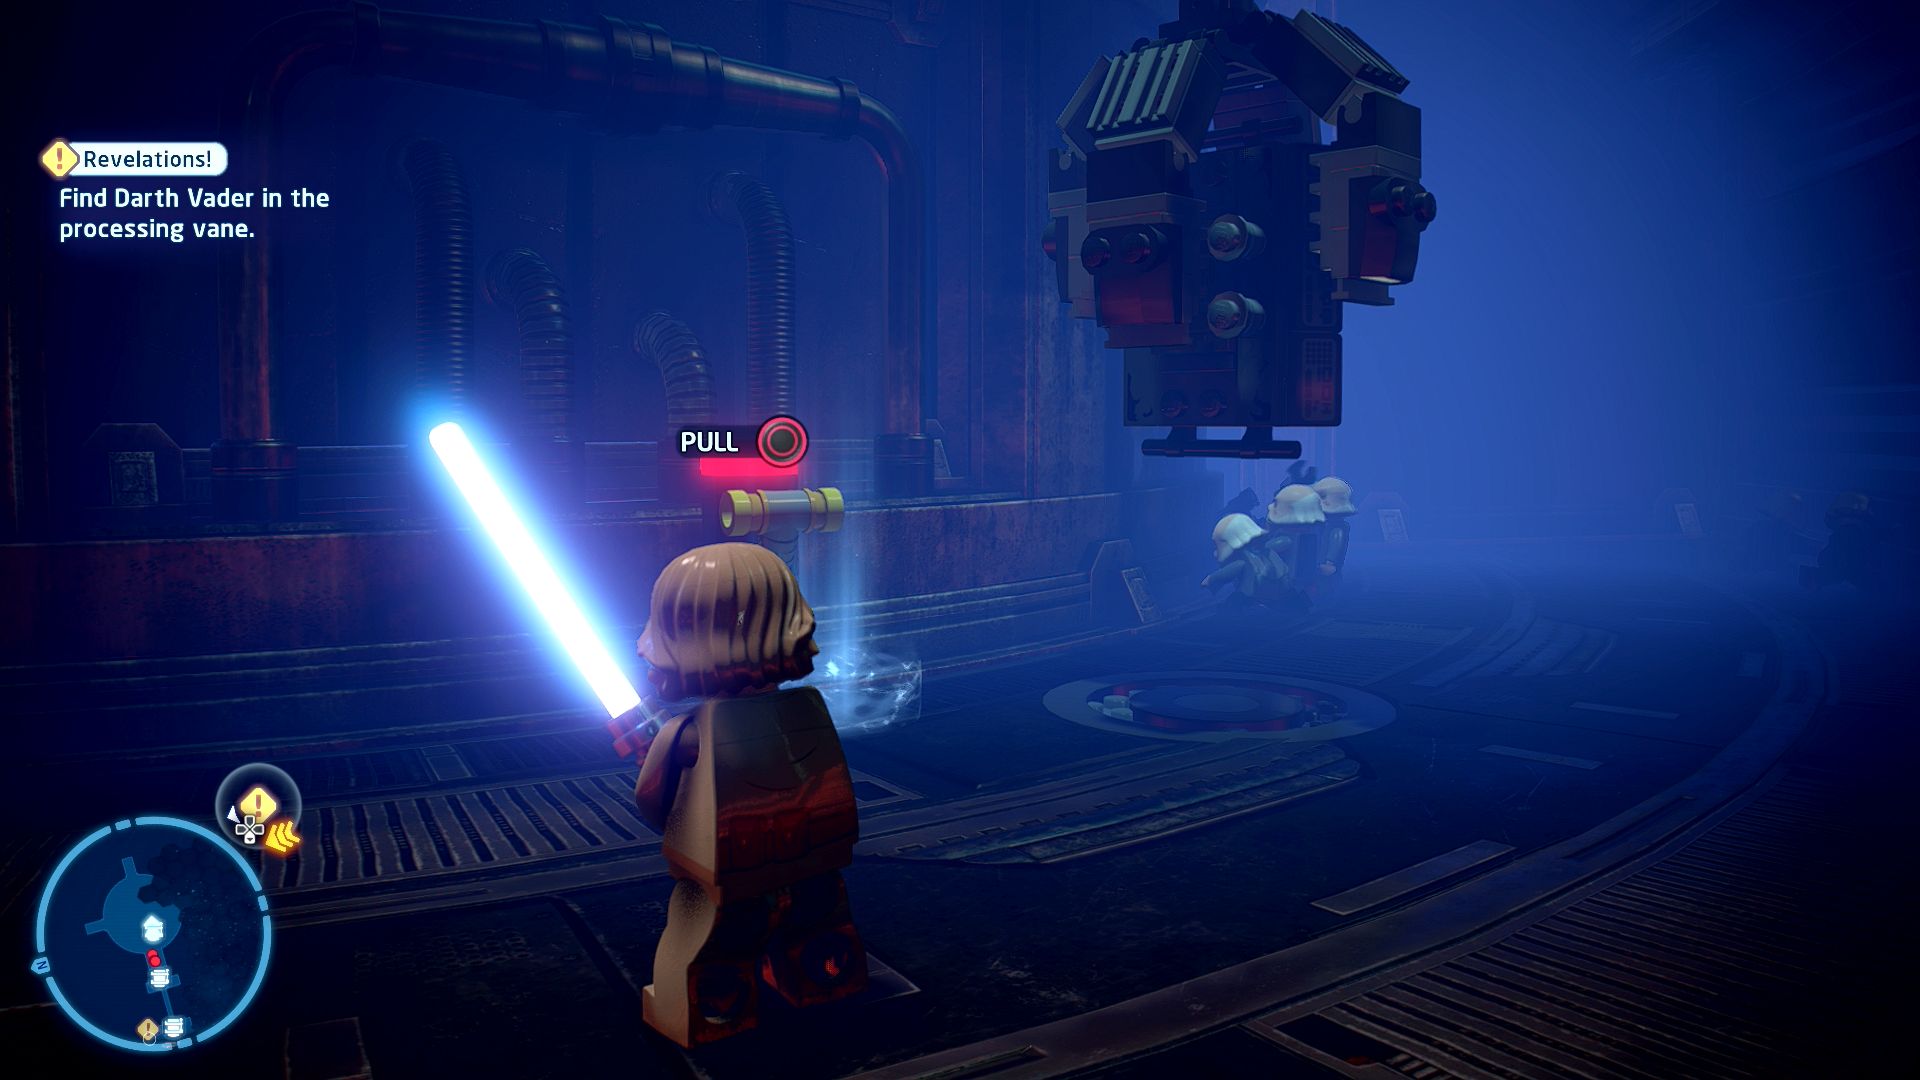
Test out the carbon freeze equipment for yourself.
After Darth Vader runs off for the first time turn around and pull the lever on the base of the carbonite freezer to defrost the hanging minikit.
Minikit 2/5 - Hatching a Plan
Requires: Grapple Story Mode: Yes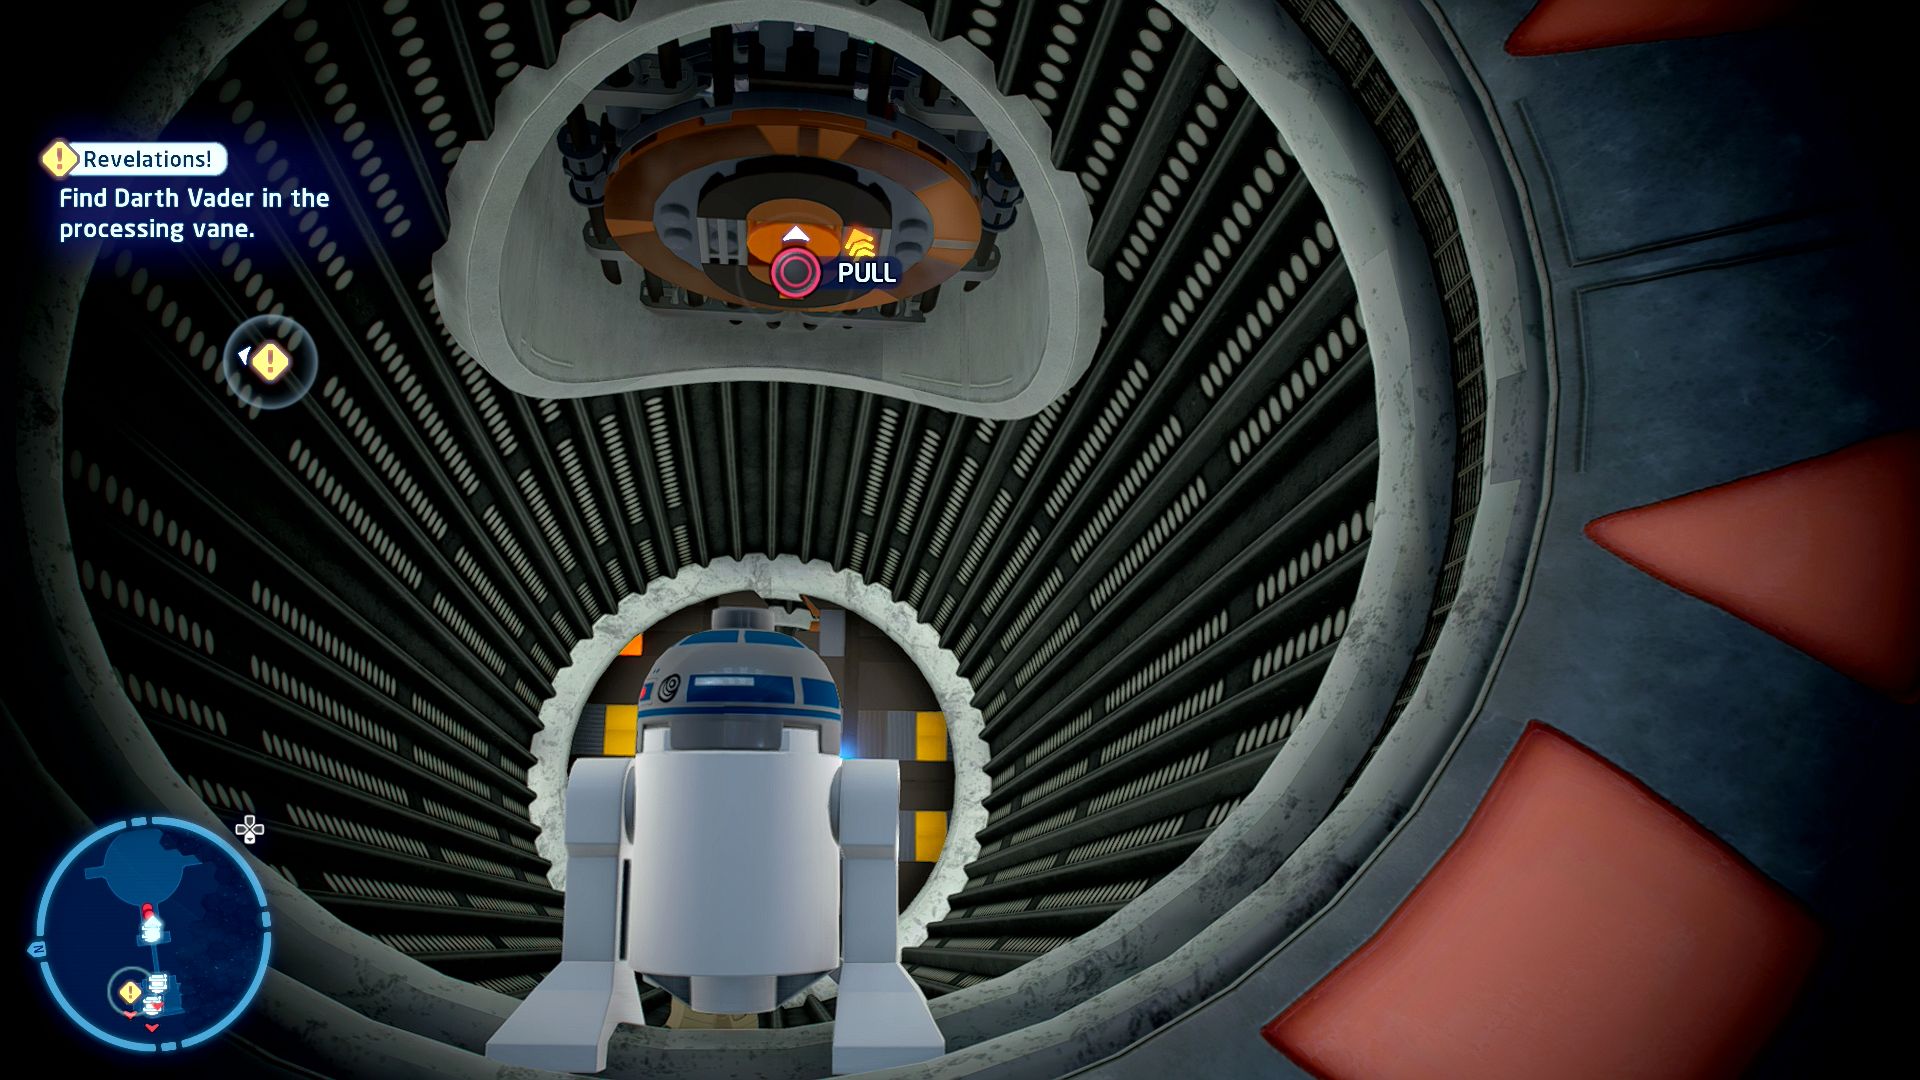
Hatches often lead to new locations... Sometimes locations with prizes!
After going down the first pipe turn around and go back up the middle pipe that Darth Vader used. On the ceiling is a grapple point to pull down.
Minikit 3/5 - Tabletop Games
Requires: Protocol Droid Story Mode: No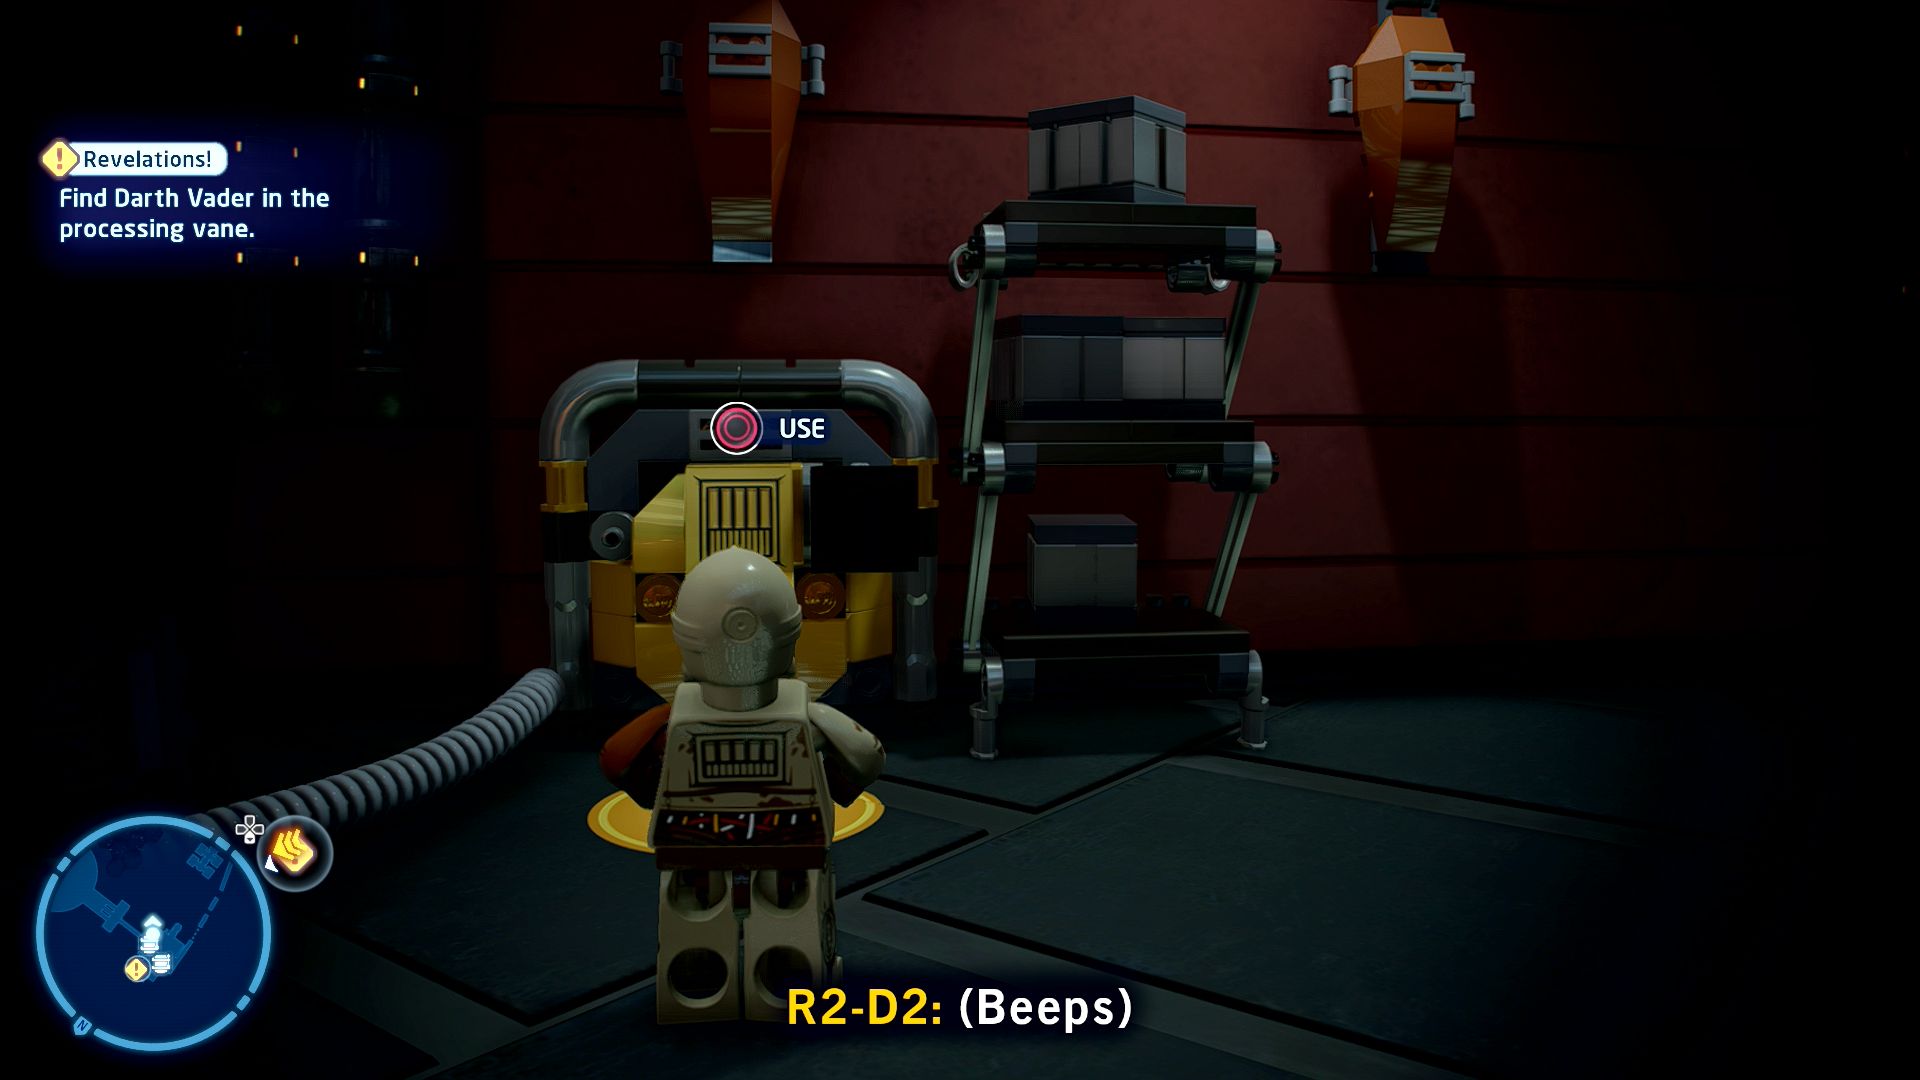
Some games require a password to gain entry. Fancy!
In the room where Vader is hiding in the dark se the Protocol Droid Terminal to raise the minikit out of the floor.
Minikit 4/5 - In Case of Emergency
Requires: Hero Story Mode: No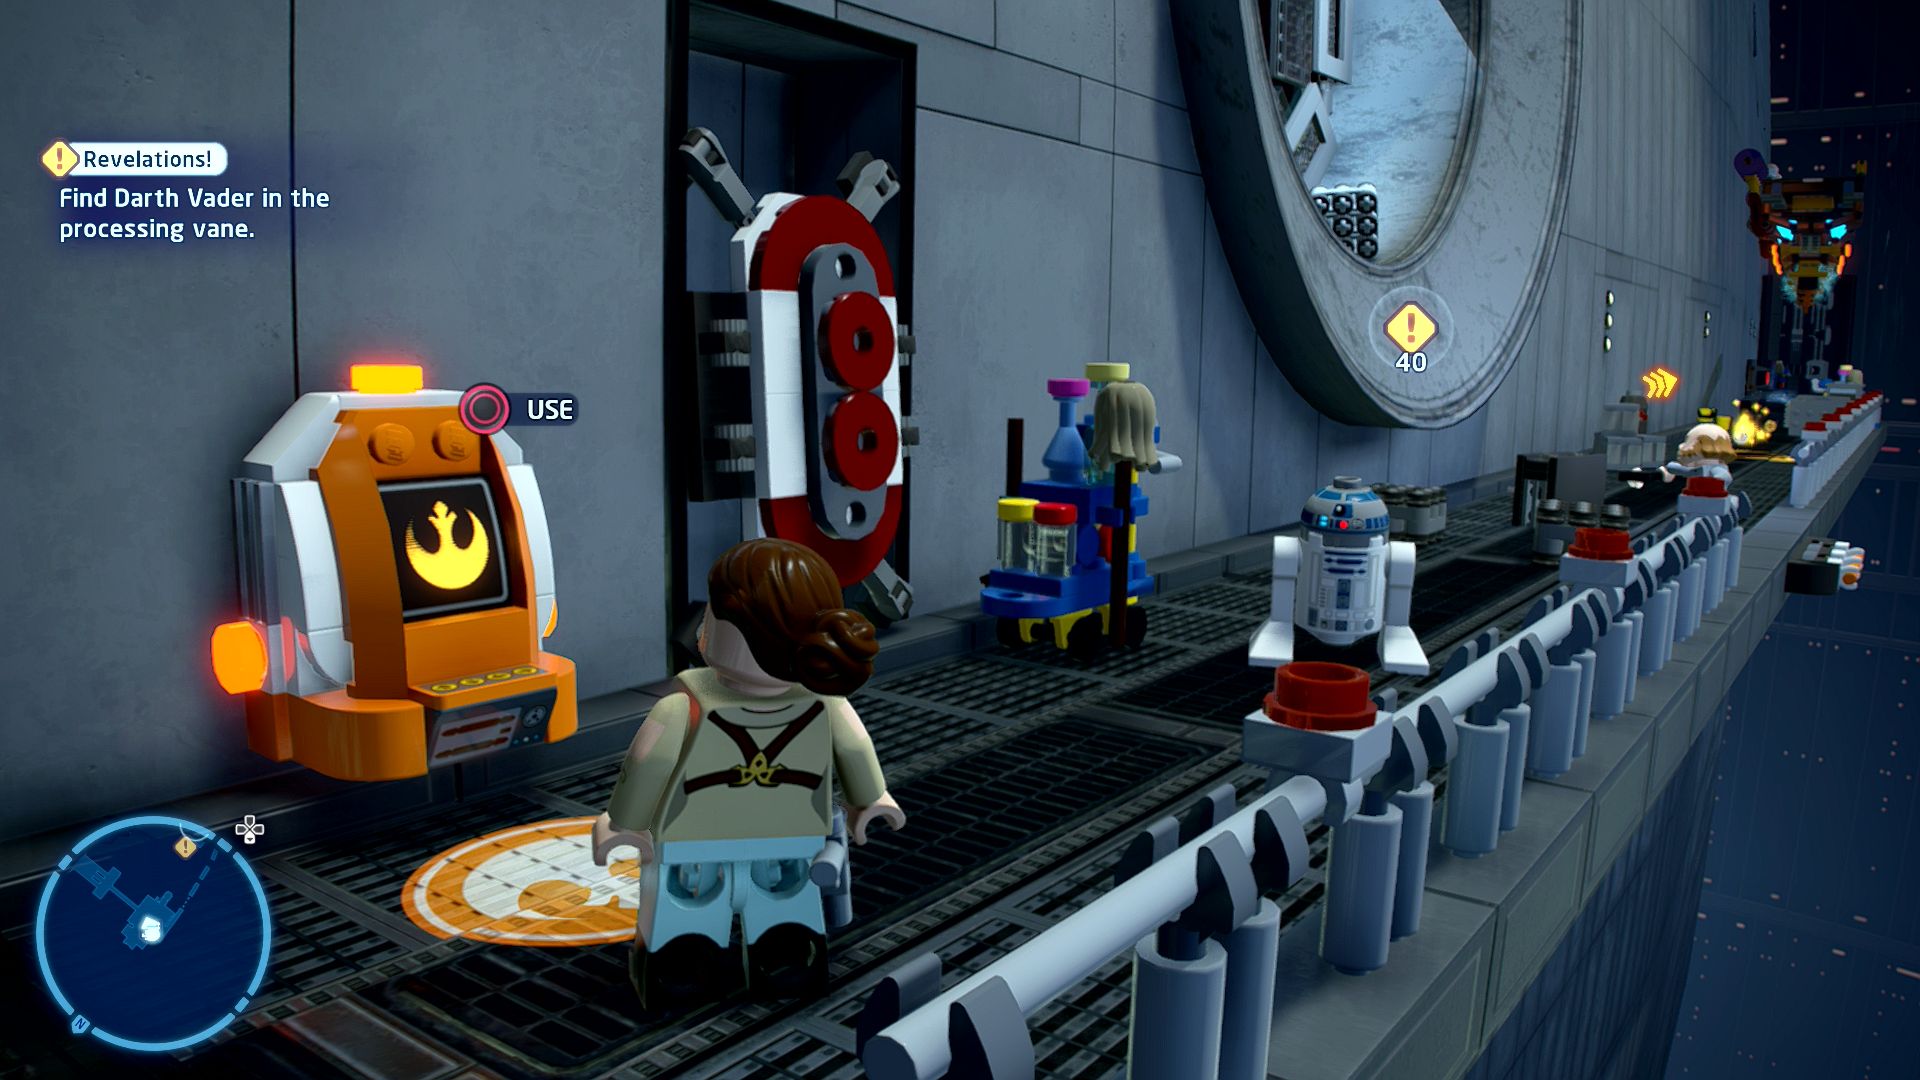
Rebels are quite resourceful when they need to be...
Just after getting sucked out the window there is a Hero Terminal to activate.
Minikit 5/5 - Vanity Room
Requires: None Story Mode: Yes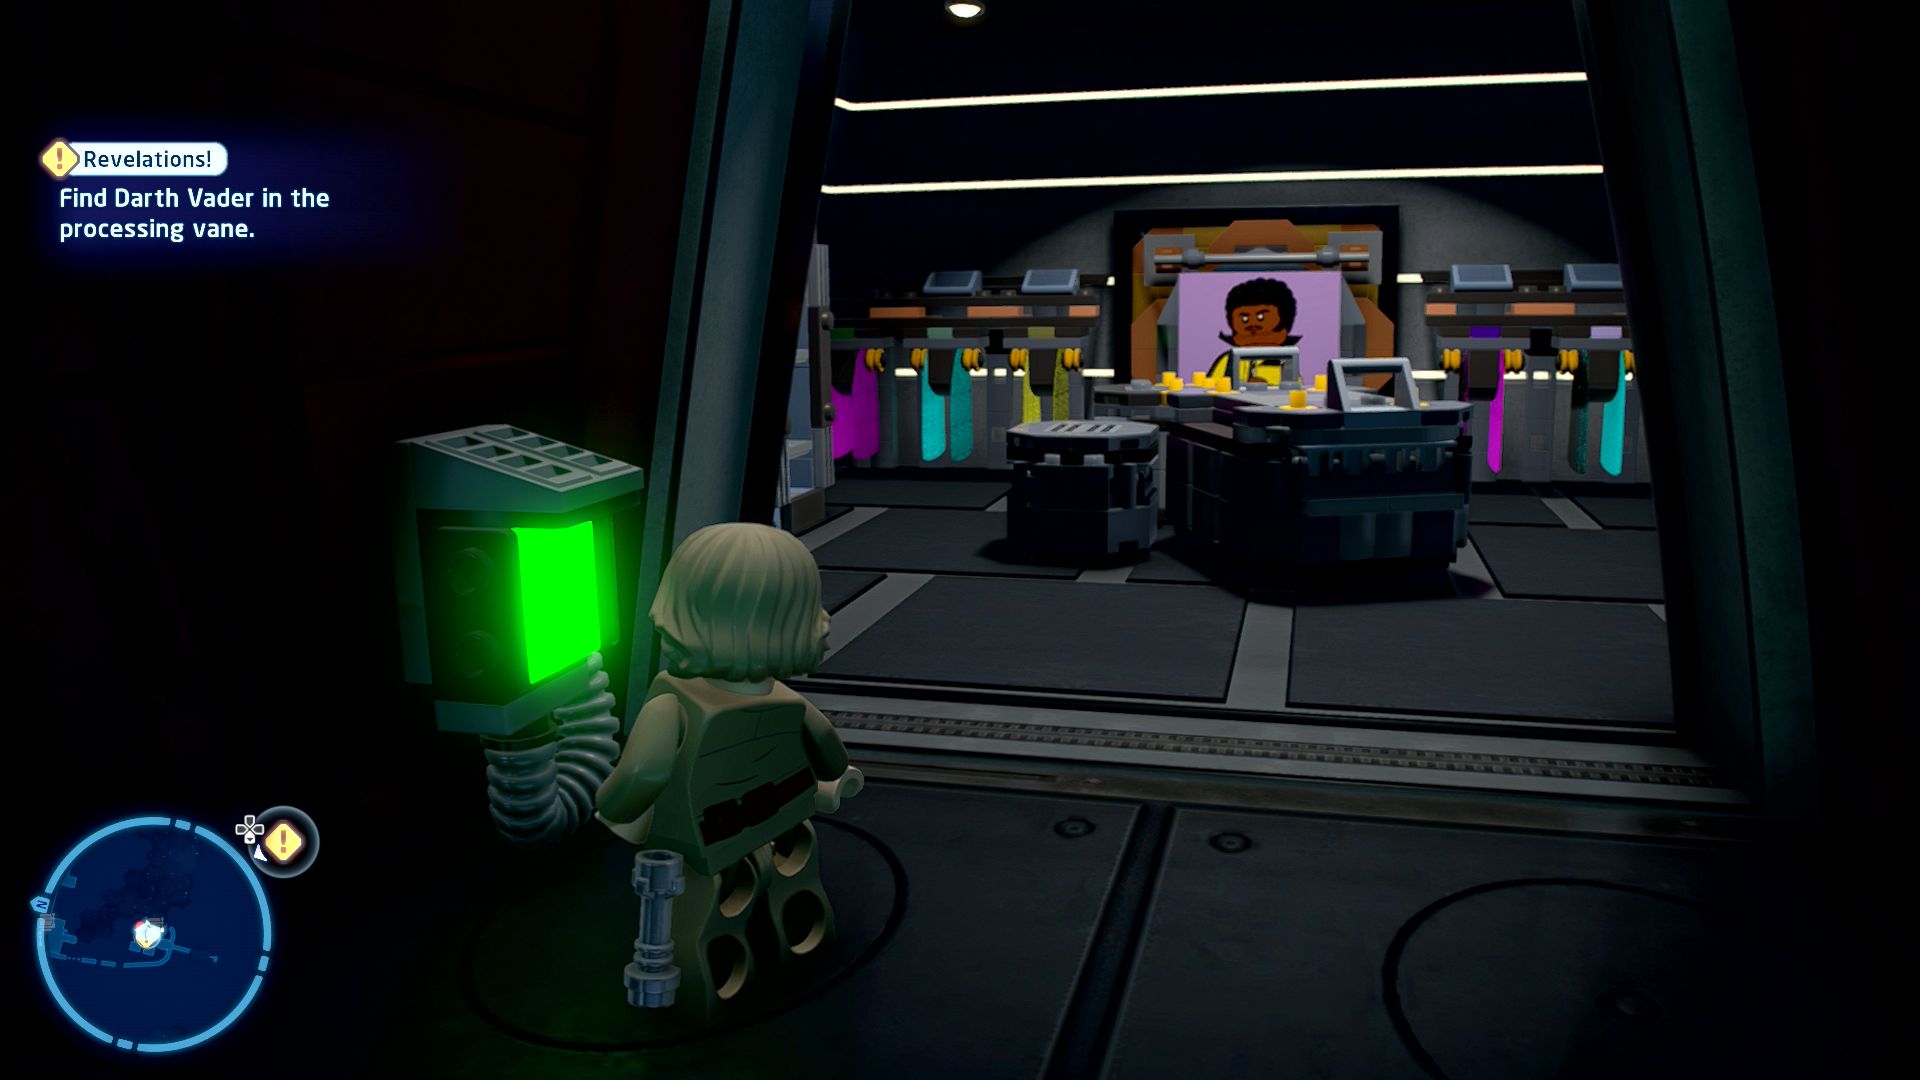
Lando really loves his capes...and himself!
At the end of the level where you open doors to look for Vader enter the room with Lando's portrait and take his portrait off the wall to reveal the minikit.
Rebel X-wing

Based on set 75032
X-Wing Fighter
| Cost | Character | |
|---|---|---|
|
|
- | Lando Calrissian (Han Solo's Clothes) |
|
|
200,000 | Han Solo (Carbonite) |
You have unlocked Episode VI: Return of the Jedi!
 darkspyro.net